In the article we will deal with the technology of laying a soft roof "Shinglas". First, we will talk about what this roofing material is, on the basis of which it is made. And then we proceed directly to the technology of mounting on the roof.

What is the Shingals soft tile
This material represented in the Russian market by the manufacturer - the corporation "TechnoNIKOL". Production is established in conjunction with the international company "Chova". This material represents shingles of a small rectangular size. It is made of fiberglass, which is coated on both sides with improved bitumen, and on the upper front side also with stone granules. The latter is not only a decorative layer, but also a kind of protection from the harmful effects of sunlight.
In addition, basalt dressing copes well with mechanical loads, it does not fade, so the Shinglas roof has its original color throughout its operation. In addition, the front surface has a rough surface, which means that the Shinglas never leaves an avalanche-like descent from the soft tile.

The back side of bituminous panels is sprinkled with sand so that the sheets do not stick together during their work. storage in packs. The treatment with a sticky mixture, in which the bitumen enters, is also carried out. This mixture is an additional fastener. It is used to sinter tiles on the roof under the influence of positive temperatures and the sun. The bituminous mixture is closed with a silicone film, which is removed before installation.
It should be noted that the company TechnoNIKOL today offers Shinglas tiles with 14 collections and 70 shades. This huge variety makes it possible to decorate the roofs of houses for any, even the most demanding taste. At the same time, the manufacturer gives guarantees for 50-60 years for its products, which also captivates many consumers.
We add that mounting a Shinglas is a fairly simple process. The main thing is to strictly follow the rules for laying material recommended by the manufacturer.

Shinglas Shinglas Bitumen Tiling Technology
Let's start with that the installation of shingles produce only on a continuous crate. It can be boards, moisture resistant plywood (FSF) or OSP-3 plates (moisture resistant). Boards are laid on a truss system with a small gap within 1 cm. The same applies to panel materials, only their installation is performed in a staggered manner, that is, with the displacement of sheets of one row relative to the adjacent half of the plate.
Please note that the foundation for shingles should be not only durable, but also very smooth. The permissible error of the drop in height is up to 2 mm, not more. This is a strict parameter on which the quality of the final result depends.
Now successively over all the operations performed.
Installing a drip
The purpose of this element is to prevent precipitation from getting into the form of water under the roofing structure. The shape of this is a square, made of galvanized sheet steel, painted on both sides.
The drip is placed on the edge of the overhang of the roof and is hammered to the crate with roofing nails in a staggered pattern every 15 cm. 3 cm.

Laying the lining carpet
This is a bitumen-based roll material -polymer binder. Today Technonicol Corporation offers four types of this coating. At the same time, the species are divided into two groups:
-
Self-adhesive lining materials.
-
With mechanical fixation.
The first group includes:
-
ANDEREP ULTRA , which is based on a polyester coated with a bitumen-polymer mixture and sanding on the front side;
-
ANDEREP BARRIER is a baseless material, in the upper layer of which a thick reinforcing film is inserted.
The second group includes:
-
ANDEREP PROF with polyester base and top polypropylene coating;
-
ANDEREP GL - baseless material with double-sided sanding.
It should be noted that the lining material is placed first in the valleys and eaves overhangs. Installation begins with the first. That is, a roll with a width of 1 m is rolled out so that it covers two adjacent roof slopes of 50 cm on each side. Immediately removed from the laid strip protective polymer film.

On our site you can find contacts of construction companies that offer design and repair services roofing Directly to communicate with representatives, you can visit the exhibition of houses "Low-rise Country".
Then covered with lining and overhangs. The strips are simply laid out parallel to the eaves, so that they cover 40 cm of the eaves and 60 cm of the roof. If the cornice is more than 40 cm, then you will have to lay not one strip of material, but two: one above the other in the direction from the overhang to the ridge. In this case, the strips are laid overlapping - 10 cm. Horizontally laid strips must necessarily cover a part of the material laid on the valley as well. Here the overlap is 15 cm.
Regardless of whether self-adhesive material is selected for covering the roof or with mechanical fixation, it is recommended to fix the laid strip with galvanized roofing nails with fixing pitch 20-25 cm around the perimeter .
Now the remaining planes of the batten that are open from the lining carpet are covered by it. Just lay the strip overlapping relative to each other, promazyvaya edge bitumen mastic "Fixer" and punching them with nails.
Installation of gable strips
This element of the roof construction is necessary in order to protect the solid front of the roof of the roof from rain and wind. Installation is carried out in the same way as the installation of a drip.

Marking of the slope
In fact, this stage of the mounting technology Shinglas soft roof is important, although many masters do not use it. It facilitates the installation of shingles exactly along the intended lines. Therefore, the markings are vertically every 70 cm — this is the distance where five rows of roofing material are placed at once. And horizontally - 1 m, this is the length of shinglas shingles.
Laying of the end carpet
This is a roll-based material of polyester, treated on both sides with a bitumen-polymer composition. It is placed on the valley to increase the waterproofing layer, because the valley is more than the other sections of the roofing structure subjected to loads from precipitation.
The end carpet in the form of a strip is laid so that it covers the edges of the laid lining material with its edges. Mounts produce bitumen mastic and nails. First, a mastic of 10 cm is applied along the edges of the lining material.

It might be interesting! In the article on the following link read what you should pay attention to when building a roof from metal tiles by SNiP.
Installation of the start strip
This is a strip of the same material as the Shinglas shingles, the same length and width. Only in its design there are no shingles. If this element of soft blood is not, then you can use an ordinary tile, in which the shingles are cut.
It is necessary to begin the installation of the starting strip from the middle of the overhang, placing the elements in different directions to the pediments of the roof structure. The material itself is self-adhesive, so the back side must remove the protective film and lay the strip on the roof, pressed to the surface. Additionally, it is attached to the crate with roofing nails along the perimeter with a step of 15 cm.
Please note that one hundred starting strips are laid out from the edge of the eaves within 1.5 cm from the edge. If you use an ordinary tile as a starting strip, then laid on the bitumen mastic, which is pre-applied on the lining carpet.

Installation of ordinary tiles
Laying of bitumen tiles should be started from any edge of the roof. The shingle is laid in such a way that its lower edges recede from the lower edge of the starting strip by 1.5–2 cm. The material itself is attached to the slope of the roof with four nails. Nails are driven at a distance of 2.5 cm from the edges of the cut shingles. This is done so that the tiles of the next row close the fastener heads.
I would like to add that if the slope of the roof slope exceeds 45 °, then it is recommended to drive not 4, but 6 nails into the laid tile.

Formation of the valley and gables
Everything is quite simple here. It is necessary to leave a gutter from a 10 cm wide end carpet. That is, 5 cm is laid off from the end valley axis in two directions. It is up to this parameter that Shinglas bitumen tile will be laid.
-
Therefore, along the gutter line , bitumen mastic 10 cm wide is applied.
-
Bitumen panels are laid material, the edges of which are pressed against the mastic strip.
-
The edges pierce nails .
They do the same with gables. That is, put mastic, laid tile, which is pierced with nails. Please note that nail heads should remain under the roofing materials laid over the already laid.
It may be interesting! In the article on the following link read about the correct control over the construction progress - technical supervision.
Forming a skate
Shinglas laying technology on the roof is not just a covering, it is the complete formation of the remaining roofing elements where the ridge plays an important function. It is through him that the roof will be ventilated. Therefore, before finishing the ridge part of the roof, a special element is installed, which is also produced by the company TechnoNIKOL. It forms the ridge of the roof and leaves holes for ventilation.

The ridge element is attached to the crate, and then closed with a starting strip, which is simply nailed. The starting strip is not placed along the ventilation element, across, cutting the strip into several pieces, usually into three.
In principle, this is all about the installation of shinglas shingles.
The video shows and tells the sequence of operations for laying shinglas shingles:
Useful tips
As mentioned above , the soft roof Shinglas is several collections. So there are some differences in the process of laying bitumen coatings of different models.
-
If the model " Jazz " is being stacked, the shifts of one row relative to another should be within 15 to 85 cm. That is, there is no specific parameter.
-
Trio, Tango, Sonata are shifted by half the width of the tile's petal.
-
Model Accord is laid so that its right petal overlaps the joints of two adjacent tiles of the lower row.

It might be interesting! In The article on the following link read about the prototype of a floating island with a living tree launched on the Copenhagen harbor.
Conclusion on the topic
Roof covering "Shinglas" is a real opportunity for a little money to solve the problem of obtaining a high-quality roofing structure that will last at least half a century. Of course, if the very soft roof lay according to the rules of the manufacturer. But, as the information from the article shows, this is not the most difficult process that does not require special tools, equipment and materials. In addition, the company TechnoNIKOL offers a complete set of its own production. That is, tile, roofing and roofing, and mastic, and ventilation elements, as well as drips and pediment strips.
Search
Related Articles
technologies, materials used, foundation types, screw piles, clips

Damage to the foundation is not always noticeable, but crooked openings and newly formed cracks are a clear sign of the need for repair. It is better not to delay the process of restoring the founda...
Typical and individual projects of houses with a pool: the nuances of choice
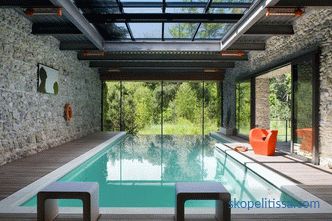
Everyone dreams of a beautiful pool house. Particularly attracted to projects with a pool under the same roof with the rest of the room. Plan its equipment should be at the stage of development of t...
design features and construction technology
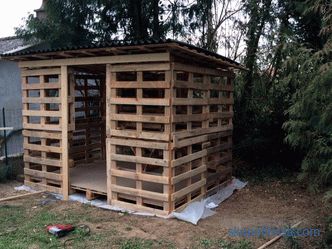
A small barn at the cottage is an object necessary. It can store garden tools, tools, some household items that are not used in the winter, and so forth, so on. Today, many gardeners use wood heatin...
Foundation concrete block 200x200x400, characteristics of the FBS block for the foundation, application, prices in Moscow
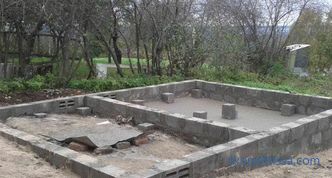
In those cases where, for whatever reason, it is not possible to fill in a monolithic foundation, we can consider the possibility of mounting the foundation of a building from concrete foundation bl...