Bath from a bar - an additional building on the site, which is not as easy to build as it may seem at first glance. If you have professional building skills, special knowledge and experience, drafting and implementing a project will not really take much time. However, it is quite dangerous for a novice to take on such a thing: the construction may not last for a long time. In any case, you should familiarize yourself with the features of projects and their implementation.

Preparation for construction
Before you build a small bath, you must complete the preparatory work.
Choosing a location for the location
Any design, regardless of area and purpose, should be started to plan, following certain rules and regulations. A place for a bath should be chosen according to a number of requirements.
The building should not:
- Be too close to a residential building.
- Harm communication system.
- To overshadow the area nearest to it.
It is recommended not to build a bathhouse next to the window so that it does not block the view. Not because of the regulations, but because of the aesthetic sense.

The distance to other structures should be taken into account in order to avoid problems with state employees and neighbors. The rules of SNiP regulate at what distance it is necessary to build a bathhouse from other structures. According to the rules established by the state, from a bath house to other structures and buildings should be:
- 3 meters - to a residential house;
- 4 meters to medium-sized trees, and 5 meters to large ones; 22>
- 1 meter to other shrubs;
- 4 meters from buildings where animals are kept.
The choice of material for walls
Yes, you can build a bath of any materials. But it is desirable not to use the same brick, polystyrene concrete and foam block. They heat up too much and then cool for a long time. In such constructions strong humidity is created, and when airing the room dries very quickly.
Bricks and blocks, if desired, can be used, but they must be multi-layered for such a changeable thermal regime.

The best option is a bar. It does not require any lining. In addition, it is the tree that gives healthy and healthy steam when heated.
Drawing up project documentation
Creating a bath project consists of:
- Sketches and drawings.
- Scheduling work.
- Calculating estimates.
With the help of the drawing you can:
- make the correct orientation to the cardinal points;
- plan the doors and windows;
- correctly conduct the wiring .
It is recommended to build a bath not as an extension, but as a separate building.

When designing a project, take into account the climatic conditions and the location of the object:
- Windows should be supplied from the west and south.
- Doors to put on the side of the house.
- If there is an opportunity, it is better to build a bathhouse on any elevation. Due to this stormwater will bypass it.
On our website you can find contacts of construction companies that offer the construction of a bath from a profiled bar. Directly to communicate with representatives, you can visit the exhibition of houses "Low-rise Country".
Obtaining permission from administrative authorities
If you build a bath without approving it in the appropriate structures, according to any complaints from neighbors, it can be demolished.

Therefore, it is necessary that the project be approved. To do this, it must include:
- Floor plan, even if the bath consists of one floor. The plan should include detailed drawings, cuts and explication.
- Approximate estimate for materials.
- Foundation type with drawings.
- The written consent of all the nearest neighbors to the construction of the bath.
Obtaining permission is a mandatory procedure.
Bath planning
In order for the project to be complete and to get permission from the administrative authorities from the first time, it is necessary to know the bath device well. This will help you make the right drawings.
Baths consist of 4 parts:
- Waiting room.
- Shower.
- Steam.
- Tambour.

Tambour
After entering the person enters the platform. The platform is at the same time a hallway and protection of a waiting room from hit of cold air. It is sometimes used as a dressing room. Size chooses the future owner.
Waiting room
There is a waiting room behind the vestibule. This is a room where people relax. Because of this, it should be made comfortable, convenient, and most importantly - spacious.This room is also used as a place for cooling, so the presence of a window is necessary.

The minimum recommended area is 6 m. For added convenience, it is advisable to put a table, a TV and a bench for relax.
Important! Many make the floor slippery. This is a gross mistake. After leaving the steam room, your feet can be wet, which will directly lead to injuries.
Shower
Next comes the shower. In addition to washing equipment, if you wish, you can put a toilet. If there is enough space, it will be a great decision to place the pool. 3 meters under it will be enough.

Steam room
At the very end of the bath is a steam room. The main thing to consider is that the doors should not go out onto the vestibule! This mistake will constantly reduce the temperature in the steam room, which will reduce its effectiveness.

It might be interesting! In the article on the following link read about bath from a turnkey log.
Stages of building a bath
Below is a step by step answer to the question of how to build a bath from a bar.
Foundation
Construction of a bath from a timber begins with the construction of the foundation. The strength of the structure will depend on the quality and reliability of the base. Therefore it is necessary to treat this stage with all responsibility.
Nuances:
- In addition to the material, choosing the type of foundation, you should consider the type of soil and land relief.
- Considering that the timber structures are not heavy to equip the foundation with even relief, a strip foundation will be an excellent choice.
- If the relief difference is more than one meter, it is better to choose bored piles.
If it has been decided that a bath from a bar with a strip foundation will be erected on a specific land, it is necessary to begin work as follows. The first thing transferred the finished plan for the terrain. Theodolite will help in this. In the absence of this construction device, it is proposed to use pegs and cords. Using them, you can also draw straight lines.
As soon as the marking is ready - the construction of the foundation begins. First of all digging trenches. Their depth determines the type of soil and the depth of freezing in this area. If the soil is heaving, the trench should be 17-20 cm more than the maximum depth of frost penetration. Depending on the climate zone, the latter figure may vary.

A layer of sand is laid in the finished trenches, the minimum thickness of which is 13-15 cm. Then install wooden formwork. In addition to the wooden board, for this purpose use any sheet materials:
- slate;
- boards;
- plywood, etc.
Then lay a layer of waterproofing for the foundation. To give rigidity to the structure, the foundation can be reinforced using a frame of 14 mm rods, which are connected with wires. After that prepare the concrete mix to fill the trench. After 4 days the formwork is removed.
Choice and purchase of a bar
Further steps directly depend on the raw materials from which you need to build a bath from a bar. It is only necessary to prepare in advance the quality wood needed for the construction of walls in the bath.
Bar is one of the most popular and best building materials for a bath:
- It gives minimal shrinkage.
- Does not require fitting.
- Mounted on a small foundation.
But at the same time, its quality directly depends on the selected raw materials. Therefore, at the stage of procurement of the material, one must be extremely attentive.

When finding a site in a temperate zone, it is not recommended to use logs that are less than 20 cm thick Otherwise the walls will be too small and thin. Consequently, the heat will be kept inside very badly.
Small logs are often used in an attempt to save money, but this is a cancer mistake. This will only increase costs, because, you will need to sheathe all insulating materials.
Important! It is necessary to find and buy a good timber. You should not spend money on material with defects. If there are cracks, axial deformations or lesions, it should be discarded and searched elsewhere.
At the time of purchase should pay attention to the thickness of the trunks. If possible, it is better to buy those logs, the difference in thickness between the ends of which does not exceed 3 cm. Timber is cut along the length of the bath. In most cases, the size of bath complexes are 6x6 or 6x3.
Laying rows
Next you need to proceed to the assembly work on the assembly of the log house. The log house includes several crowns:
- The first row is called the layover crowns. It is advisable for him to use the thickest logs and lay them on a foundation base.Prior to this it is necessary to lay a waterproofing. After that collect the lower trim. It makes logs to further collect the floor.
- Then comes the horseshoe crown. On it stack a window row, and further - above window. How many rows there will be is calculated during the creation of the plan. The height of the building depends on this factor.
- At the last stage, when all the crowns have been installed, the log house is left for some time. He should sow and take his final look. The best time for this procedure is up to 700 days.
The laying of the rim is considered to be the most important step in building a bath:
- Bars 20x20 are excellent for the first row.
- Mandatory - all bars should be cut so that their length is the same.
Important! Even small accuracy cannot be allowed. In most cases, choose "in the paw" as a type of connection.
When laying a bath on linings, rather than on a foundation, it is advisable to build a temporary roof over the building.

It takes a lot of effort to perfect the arrangement of the rows and to lay them as smooth as possible. After the end of the first row, the remaining space between the base and the materials is filled with foam. There is no need to fix the first wine - overall stability ensures the weight of the structure.
As soon as the process of assembling the framework is completed, window and door frames are installed.
Installation process: additional factors
It is imperative to install waterproofing between the base and the first row of the bar. The surface is covered with bitumen, then a layer of roofing material is applied. As soon as the first layer cools, impose a second and roofing material.
Mortgage rows should always be treated with antiseptics:
- Special attention should be paid to the surface adjacent to the base.
- Lube oil is great as an impregnation.
Most professionals use this particular oil because it is cheap and is sold almost everywhere.

Next, the rail is processed. The maximum thickness is 1.5 cm. Reek should be purchased so that it is enough for the complete closure of the foundation. First, they are laid on the ground. This is done for:
- Lack of contact with the foundation.
- Improved ventilation.
- Protect trees from mold and mildew.
All of the above will increase the shelf life of the tree.
Roofing, screed and final finishing - the final stage
We build the bath from the bar further and reach the final stage. After completion of the main works (walling and foundation, etc.) it is necessary:
- To lay the floor.
- Make a small trim inside.
- Check out the roof.
The roof is made very simple. It is necessary to choose between odnoskatnaya and gable. Their main difference is in the slope. The gable is made of 2 planes, which together form a ridge.
Saw single is one web. It is chosen for garages, sheds and other non-residential buildings.

It is with the installation of lags that flooring begins. On the logs laid boards. They are preferably made of pine or larch. Be sure to need a floorboard!
Further work directly depends on which floor is being built. In the baths do not leaking or leaking floors. When choosing the second option, the boards are simply placed as close to each other as possible, slightly increasing the angle. At an angle, water flows into a chute or siphon.
Further finishing is entirely a matter of the owner's taste. The timber is an interesting and design material that does not require much effort in the design after construction. Leaving it in its original form, it will be possible to create the atmosphere of a classic Russian bath.
It can be interesting! In the article on the following link read about building a bathhouse on the site.
Interesting ideas for decorating the bath interior - in this video:
Search
Related Articles
Turnkey frame houses in Moscow: projects, photos and prices
If you decide to buy a house, so to speak, "turnkey", before contacting the construction company, you should be familiar with all the features of building a country house. You can read about the tec...
Project of heating a private house, designing a heating system for a country house, examples of calculation, photo
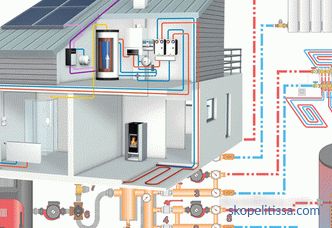
Any heating project of a private house, office or apartment does not begin with the purchase of good equipment, as some users believe, but with the creation of the project. It includes a detailed ca...
The interior of the wooden house inside: photo and video ideas
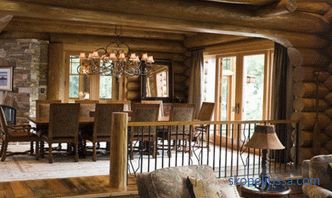
From year to year, an increasing number of families prefer a tree house for permanent residence. The interior of a wooden house inside can be made out in different ways. The article tells about the...