Today we will talk about a light foundation for a shed, that is, a structure that does not require large capital investments. Although for the barn this option is optimal anyway, because he himself is a light construction. We will talk about the types of light foundations, and how to build them. Having understood, especially in the technology of construction, you can easily monitor the work of builders who were hired to build a barn.
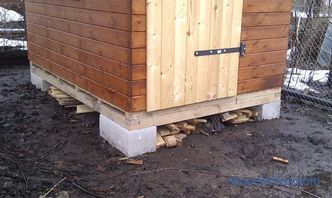
Types of light foundations
Usually, this is not the case for foundation structures. That is, there are no heavy or light (this is the name of concrete), they are classified by design features: tape, slab, pile, and so on.
But in everyday life such a name is present, only it means that a light construction like a frame, panel board or any other wooden structure will be erected on the foundation structure.
So, as for the foundation under the barn in the country. There are several simple options:
-
bored piles;
-
screw piles;
-
column construction.
Consider each species separately, but first we denote one moment. There is a strict requirement that states that the foundation should be laid below the level of soil freezing. When it comes to light buildings, this requirement can be neglected. The maximum possible depth is 1 m, more than enough.
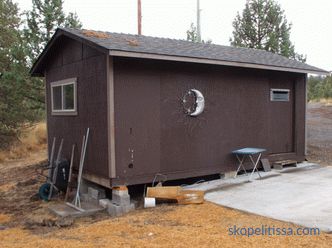
Preparation for the construction of the foundation
Regardless of which view The foundation structure will be selected under the shed, it is necessary to carry out the markup. Mandatory foundation elements are laid at the corners of the building, as well as at the junction of the outer and inner walls. All the rest, so to speak intermediate elements, are installed in increments of 1-2 m, depending on the severity of the structure itself.
Bored foundation
You can call this foundation construction bored with pressure. But, in any case, the technology is very similar:
-
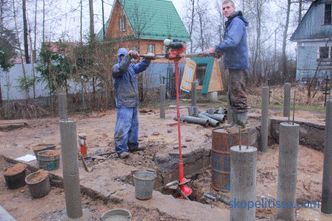
In places for the foundation elements, boreholes with a diameter of 200 mm are drilled, for which a manual or electric drill is used. Drilling depth - 1.0-1.2 m.
-
If it is necessary to increase the bearing capacity of the rack, at the bottom of the well expand to 400 mm.
-
The bottom is covered with sand or gravel 5-10 cm thick, rammed.
-
A pipe is rolled up from a piece of roofing felt to make it two-layered. Pipe length: well depth, plus 10 cm (this is the basement).
-
The top of the pipe is fixed with adhesive tape.
-
Install a ruberoid sleeve in the well.
-
A prefabricated reinforcing frame of three reinforcement bars, assembled in a triangle section, is inserted into it.
-
Fill the well with concrete solution, which is necessarily pierced with reinforcement or a piece of steel pipe. The goal is to remove air from the mortar, which reduces the strength of the concrete product.
-
This is how all drilled wells are poured. After 28 days, the foundation can be loaded.
On our site you can find contacts of construction companies that offer the service of designing and repairing foundations. Directly to communicate with representatives, you can visit the exhibition of houses "Low-rise Country".
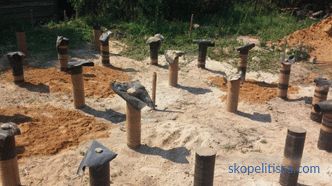
It should be noted that instead of ruberoid any finished pipe can be used: metal, plastic, asbestos or cement. The main task of the manufacturer is to pour the concrete elements so that their upper ends are located in the same horizontal plane. This is not always possible. And the greater the difference of the planes, the more difficult it will be to lay the horizon under the shed on piles.
Screw piles
Screw piles under the shed is a great option. These metal structures made of pipe and screw tip easily cope with quite serious loads. The main thing is to choose the right pipe diameter. It is clear that the more it is, the more powerful the pipe is, the more loads it can withstand.
Products with a minimum diameter of 57 mm will fit under the shed. True, the length of the finished piles is standard - 4 m. In our case, only 1.2 m is necessary. Therefore, they will have to be cut to the required length, which is a decent expense. Therefore, before deciding which type of foundation to lay under the shed, consider this circumstance.
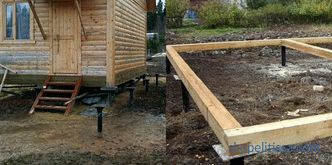
Of course, you can purchase spiral cones separately and weld them to the remains of pipes. But everything will depend on the equipment of the masters you invited. If there is a welder in their team, and an electric welding machine in the arsenal, the problem is solved quickly and easily. Costs will be minimal.
Now for the installation. There is nothing complicated about it. Each pile is precisely set according to markings made on the ground, and they begin to twist clockwise about their axis. If the soil without stones, then one pile takes 10-15 minutes. It is believed that this is the fastest way to build a solid foundation. And one important warning - screw piles must enter the soil strictly vertically. Therefore, in the process of screwing, they must be periodically checked by level.
Watch a video that shows how to screw a screw pile by hand:
That might be interesting! In the article The following link reads about how much a foundation for a home costs: an approximate calculation.
Column Foundation
This is the most common construction that is used as a shed. In principle, these are columns made of bricks or blocks. Let's see how to build a foundation for a barn of blocks, meaning concrete:
-
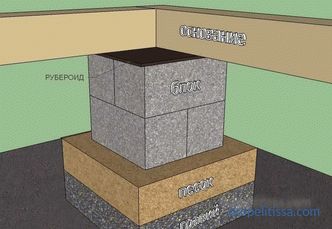
For the intended locations of the supporting pillars, dig rectangular pits with a depth of 30 cm. The dimensions of the pits are chosen so that fit two blocks. Since the standard dimensions of a single block are 400x200x180 mm, the recess side is taken 40 cm.
-
The bottom of the dimples is covered with coarse sand or fine gravel 10 cm thick. The layer is leveled and compacted.
-
Lay waterproofing. It can be any bitumen or polymer roll material, folded in two layers. Laying produce so that the edges of the waterproofing film beyond the recess.
-
Now collect a column of blocks. The first row is two blocks, then a cement and sand based cementing mortar in a ratio of 1: 2.
-
The following blocks are laid across the stacked.
-
In principle, this height is sufficient. Therefore, the upper plane is waterproofed: roofing material, bitumen mastic, polymer film, hot bitumen.
There is one trick in this technology to fit the upper ends of the pillars below the horizon:
-
First, one pillar is constructed, located in one of the corners of the building. He is immediately put on cement.
-
Then, a pin is inserted close to the wall of the block support near the back side.
-
A strong thread is tied to the upper end of the last (twine, for example).
-
The thread is pulled to the device location of the opposite pole, that is, to the next corner.
-
from the external row of the dug hole, the pin is fastened to which the free end of the string is tied.
-
Now thread out horizontally using the building level. That is, the end of which has just been tied is either lifted or lowered.
-
Now all the pillars that are under the thread are assembled to its level. This applies primarily to the corner element. If the assembled structure is higher than the predetermined level, then it is necessary to remove the sand pad a little under the blocks. If not enough, then it will have to increase in thickness. And it is possible in this case to play masonry mortar, increasing its thickness.
The foundation construction does not end there. Its external surfaces must be closed from the negative effects of natural loads. There is a huge amount of options: from plaster to lining with stone or ceramic tiles.
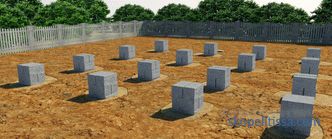
Before the finishing work on your site should be like this, as in the photo below.
It might be interesting! In the article the following link read about types of foundations.
Since in the market wall block products are represented by a different assortment, it is important to understand that not all of them can be used. For example, the foundation for a shed made of foam blocks is not constructed. Firstly, this material has a low carrying capacity. Secondly, he is afraid of moisture. And even if you carry out a serious waterproofing of columns from foam blocks, the guarantee is still low. So it is better not to pay attention to this option.
Another thing is the foundation for a brick shed. This wall material will not yield to concrete for any position other than moisture resistance. But even in this case, simple waterproofing will save the situation.
As for the construction of the supporting columns made of brick, according to the technology, it is identical to the block one. That is, dig pits, fall asleep pillow, covered with waterproofing material. Distinctive feature - laying. Although, if the barn is small, and besides the frame, the bricks are put in the same way as the blocks: the second row across the first and so on.
If the shed is a heavier structure, for example, from logs, then the brick columns are laid out, as shown in the photo below. Please note that between the bricks left space, which is filled with concrete solution.If it is necessary to increase the bearing capacity of the supports, then in this space, first lay the reinforcing frame of three or four reinforcement, and only then pour the concrete.
Other options
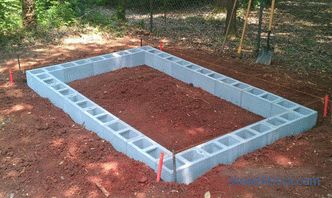
Another type of foundation can be installed under the shed - tape But only shallow. Its height is 20-30 cm, the recessed part of which is 10 cm. Such foundations are poured from concrete, even without a reinforcing frame. Assemble from blocks or bricks. Of course, they carry out waterproofing measures, create a pillow and so on. Although the size of the structure is small, but the technology of construction is kept strictly.
The slab foundation for a shed is rarely poured. This is primarily a high consumption of building materials, hence the high cost of construction. But if at the site the ground is mobile, then the plate is the optimal solution.
This can be interesting! In the article on the following link read about the pile-foundation foundation.
Conclusion on the topic
A light foundation construction, built under the shed, is an ideal solution. It does not stand under the structure, which weighs a little, to build supports large and expensive. This is primarily not profitable. And, secondly, a simple design and is built faster.
