A warm and inexpensive house that can be built in one season is the dream of any owner. These are the requirements of frame housebuilding. The small weight of all the structural elements makes it possible to dispense with the use of lifting and other special equipment, and modern heat-insulating materials make frame houses suitable for life even in harsh northern winters. But it is not enough to know how to build a frame house, it is necessary to comply with all the requirements of technology and take into account the phased features of the construction of the structure.

Finished view of the frame house
Basic rules of frame construction
To the final result of the construction did not disappoint, before building it is necessary to familiarize yourself with simple rules:
-
The main criterion when choosing lumber is the quality . It is better to give preference to glued laminated wood than to natural drying wood, which can crack as it dries. A good option would be the technical drying of the timber, which minimizes the amount of moisture in the tree.
-
To entrust the work to professionals . Building a house in which you will live is not the most suitable platform for experiments, if something is done wrong, at best this will lead to uncomfortable living conditions, and at worst - to emergency situations. And this does not even take into account the fact that construction is not only the erection of walls, but also a lot of specific types of work: wiring communications (sewage, electricity, heating), roofing at height and much more.

The professional team builds a frame house in a short time
-
Any little thing is important. Attempting to save on fixing materials, insulation or wood impregnation can be expensive. Poor quality, but cheap insulation can produce harmful substances hazardous to health. Unreliable fastening of the elements can lead to a violation of the integrity of the frame.
The technology for the construction of a frame house is a phased work, which in itself will help save budget funds. Therefore you should not save on building materials.
Choice of a place on a site
Two groups of factors that influence the place of a future home are advisory and binding.
The latter include:
-
Fire regulations . Regulates the rules of the location of buildings, depending on the fire hazard. For example, the distance between buildings made of non-combustible materials is at least 6 meters, for wood and other combustible materials it is 12 m.
-
Sanitary standards . Regulate the distance from home to outbuildings, power lines, trees and other things.

To choose the right location for your home, you need to take into account many factors.
Compliance with the rules of recommendation is left to discretion hosts:
-
Orientation on the sides of the horizon . The exit of windows to the south or east will allow to achieve maximum natural lighting.
-
Accounting for prevailing winds . Do not arrange additional windows and doors on the leeward side.
-
Distance to the carriageway . The greater the distance to the road, the quieter will be in the house, but will increase the access road.
-
Appearance from the window . The location of the windows overlooking the garden is preferable than to the courtyard of the estate and to the economic building.
To comply with all standards and select the most appropriate place, you need to contact the project organization.
The foundation for the house is the basis of the foundations
A solid foundation is the key to a strong and durable house. For frame structures, they usually build a foundation of one of the following types:
-
shallow-depth ribbon;
-
pile-screw.
In the first case, excavation work will be carried out first, so that there is where to fill the foundation, then formwork is made and a reinforcing frame is laid out in it.
The second stage is the pouring of concrete. It is technologically correct to do this in one step, but layer-by-layer filling is sometimes allowed. As the formwork hardens, it is removed - the foundation must gain strength within 30 days. After that carry out waterproofing work, and begins assembling the lower strapping.

The strip foundation for the frame house
The pile foundation, in turn, is considered one of the most budget and fast-erected.
The pile is a thick metal pipe, the end of which is provided with a screw blade. They are twisted into the ground with the involvement of special equipment. There are some types of driven piles, but they are rarely used.
The advantages and disadvantages of screw piles can be found in the video:
Piles - an innovative way that recently appeared on the domestic market mounting the foundation. Therefore, while he enjoys the distrust of consumers. However, proper installation in compliance with all requirements will ensure the reliability of the building and a long service life.
Lower binding and floor
To protect the binding from moisture from below, a ruberoid or a waterproofing board is laid on the foundation. You can use bitumen mastic, but it will be more expensive than roll material. Sometimes materials combine: once the foundation is covered with mastic, and waterproofing is laid on top.
The assembly of a frame house begins with a strapping. For it, boards with a section of 15x5 cm or a bar of 15x10 cm are used. The boards are laid around the perimeter and aligned along the outer edge of the foundation. In the right places are drilled holes for studs. The second layer of boards is laid in such a way as to cover the lower joints of the boards. This gives the structure additional strength. Easier and faster installation of timber, but its price is higher than the boards. In addition, the total carrying capacity of the double board will be higher than that of a single timber.

This is how the fixed lags
look like. A 15x5 cm board is placed on the rib on the trim. It is also leveled at the outer edge of the foundation and fastened with ordinary nails. Lags are mounted from boards of the same section. Fasten with nails or special corners. The installation step is 40-60 cm.
Important! The longer the log, the smaller the step. This will ensure even weight distribution and eliminate sagging.
The next stage is warming. The easiest option - foam. It is easily cut with a hacksaw and tightly fitted to the size between the lags. This will eliminate the installation of the subfloor subfloor, which will keep the insulation.
To support the insulation, you need to fill two bars of 5x5 cm along the log. Two layers are laid in disagreement - the top layer overlaps the seams of the bottom. Joints and seams with logs are treated with sealant.

Joints with lags must be sealed with sealing materials
Important! Polyfoam refers to combustible materials, which makes its undesirable for warming wooden structures. Therefore, sheets of stone wool, polystyrene foam are most often used for thermal insulation of the floor.
A cutting board of 10x2.5 cm is used for the installation of a subfloor. Plywood 0.5-0.6 cm thick is laid on top of it. It is possible to stack plywood sheets immediately without flooring from boards. In this case, the thickness of the sheets should be at least 1.5 cm. This option is faster, but in some cases more expensive. Like brickwork, plywood is laid to a run. The gap of several centimeters between the sheets compensates for the expansion with increasing humidity.
On our site you can familiarize yourself with the most popular projects of frame houses from construction companies represented at the exhibition “Low-Rise Country”.
Strong frame - a pledge of a strong house
There are two possible schemes for the construction of a frame house:
-
building a wall on the floor and then installing it in an upright position;
-
assembly of all elements immediately in place.
The first method is usually used in factories for the production of modules of frame-panel houses. In some cases, assembling on the floor is easier than immediately in place, but the resulting construction will have considerable weight, so you need a few people to lift and install it.

Mounting an already assembled wall
Even one person can immediately assemble elements vertically. This method is slower, but will help to avoid inaccuracies in size - the details are assembled "in place".
For single-storey buildings, corner posts are selected with a section of 10x10 cm. If another residential floor is planned, the dimensions increase to 15x15 cm.
Intermediate posts should be in depth, as in the corners, and wide not less than 5 cm.
To calculate the step, there are special formulas that take into account the load on the structure. But in practice, most often the step between the racks depends on the width of the insulation. The distance between them should be a few inches less insulation. This will ensure a snug fit to the racks and heat retention.
Racks are fastened most often with metal corners - on each side of the corner. It is possible to mount with a cut in the bottom plank trim, but this can break the integrity of the whole structure.
Another old way is to mount with a dowel.

The scheme of fastening the strut with a collar
On our website you can find contacts of construction companies that offer the service of designing frame houses. Directly to communicate with representatives, you can visit the exhibition of houses "Low-rise Country".
A hole is drilled diagonally through the rack to the middle of the lower planks or timber - a wooden pin is hammered into it. This provides a secure fit, but this method is heavy in execution. In addition, if the material is wet, drying of the dowel is possible and loss of stiffness is possible.
Depending on the type of cladding, make permanent or temporary cuts. If the outer part is sheathed with sheet material with sufficient strength - it will give additional rigidity to the structure and permanent cutting will not be required.

If the exterior finish is tough - this option of mounting weights is possible.
If the finishing material will be type-setting - siding or lining, you will need installation of permanent cuttings.
The best option would be to install four small mowings on each rack - two at the top, two at the bottom.
Special attention should be given to the installation of corner posts. The technology is simple, but just installed a vertical bar can freeze through. If the cross section is 15x15 cm, then for a moderate strip this may be enough not to let the heat through.

Vertically mounted racks are fixed with cuttings
If smaller timber is used or the owners additionally want to warm the corner elements, then several options are possible:
-
To increase the thickness, two boards with a depth equal to the depth of the stand and a width of 5 cm are nailed to the corner posts. After the exterior trimming, a special trim is made at the corner, which provides an air gap between the corner and the trim. This will reduce heat loss.
-
Before the start of the outer skin, a counter-sheath is mounted that will hold the waterproofing. Usually, a 5x5 or 5x4 cm timber is used. 5 cm is the optimal size for the ventilation gap between the wall and the finishing material. The selected material is fastened to the counter-crate - wall paneling, siding, imitation timber.

Fastening the counter-sheathing to the racks of the frame house
This can be interesting! In the article on the following link read about turnkey frame houses.
Overlap
Ceiling beams are attached to the top trim by cutting or on metal corners. The hem should not exceed 50% of the thickness of the upper trim beam. Section and step of the beams depends on the purpose of the second floor.
-
If the presence of an attic or a high-grade residential floor is assumed, the construction of the floor is similar to the floor of the first floor.
-
If there is only an attic at the top, the beams are taken of a smaller section.
For convenience of work, a rough floor of 10x2.5 cm plank is laid on the floor. This will facilitate movement and make work safer.
If the house assumes a one-story construction, then the upper beams are mounted with a 30 cm outlet beyond the walls of the frame. This is done for mounting rafters.

Fastening the beams by the cutting method
Installing the truss system
An important stage in the construction of a frame house, as in any another technology - the choice of type and installation of the roof. Frame construction is positioned as a quick construction. Therefore, most often choose the usual dual-pitch design. At observance of all norms of construction, the roof of a frame house can be constructed of any configuration and complexity, but this will require more time.
For good snowfall, the slope of the roof should be more than 28 degrees, but should not exceed 50 degrees - the wind load increases several times on such a roof.
For the construction of rafters, boards of 15x5 cm and length of 6 m are taken. Of the two boards, the first pair of rafters are assembled and installed on the edge of the frame. The same pair is installed on the opposite side. Between the two pairs of rafters on both sides of the tensioned cords to control the plane of the roof. On them exhibited the remaining rafters. The step between them varies from 60 to 80 cm, depending on the choice of insulation. Wooden bolts with a section of 15x5 cm are used for strengthening. They fasten a pair of rafters like the letter "A".
How to make the truss system of a frame house is shown in the video material:
The nature of the batten depends on the chosen roofing material. It can be a soft tile, corrugated flooring or metal tile. The limit is the weight of the roofing material. For example, the use of clay or clinker tiles is not recommended - a lot of weight will create an additional load on the frame of the house.
Photos of frame houses

Frame house with a balcony

Frame house with classic German exterior finish

The original frame house with a small slope of the roof
may be interesting! In the article on the following link read about how the frame house is built.

The frame house with a veranda and a sloping roof

assemblies

Construction of a frame house during the winter period

Frame a house with a 4-pitched combined roof
It might be interesting! In the article on the following link, read about the soaring frame-modular house.
Conclusion
A frame house is a technology that is gaining popularity in the domestic housing construction. Short construction times and cost savings are significant advantages over other methods of construction. But the technology of building a frame house will require strict adherence to all technological processes and stages of construction, which will allow to evaluate its merits in full.
Search
Related Articles
Country house on the top of a mountain in the city of Belo Horizonte, Brazil
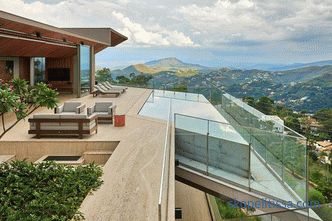
The architects of the studio Anastasia Arquitetos designed a new modern house in Nova Lima, a mountain town near Belo Horizonte, Brazil. The terrace of the cottage offers a wonderful...
Decorative facing brick: types, application in an interior, rules of laying
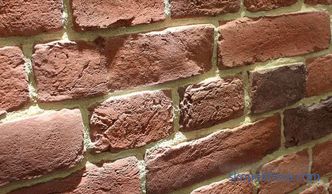
Wall decoration is one of the final stages of building or renovating a house. Most owners tend to choose the most successful way to get an optimal decorative result, combined with the strength and d...
rules of the device, stages of work, photo
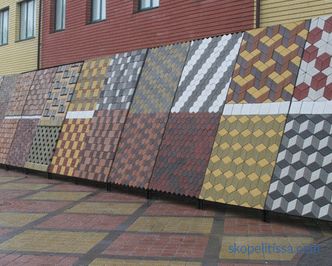
A blind area is an indispensable element for protecting the soil and the foundation from soaking with sedimentary waters. And it should be provided at the design stage. Therefore, the properties and...
selection and features, size, photo
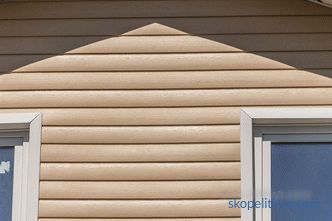
Recently, siding block house has been of particular interest to consumers. This material can perfectly convey the texture of natural wood and is suitable for finishing low-rise buildings. The main a...