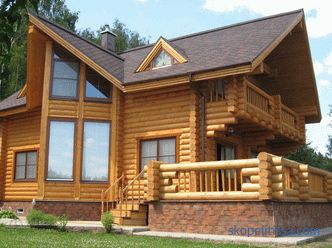
The tiled roof is a classic that came from ancient times. It would seem that its century has already passed, because cheaper, but no less durable roofing materials have replaced it. But life has shown that, like brick, tile, made of clay in the form of ceramic products, is very popular. Especially lately, when the boom of private construction began. In the article we will talk about the types of tiles, the technologies of their production, we denote the positive and negative qualities of the material, we will tell about the technology of its installation on the roof of houses.
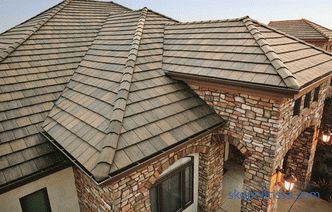
Types of tile
Today, under this term hides several roofing materials. We will only be interested in three, one of which is the tile, the second two are its counterpart, very similar in shape and size. So:
-
the ancestor of the tiled constructions - ceramic tile ;
-
its analogues - cement-sand and polymer-sand modification.
Ceramic tile
From the name it becomes clear that this product is made of clay. It is molded and fired at high temperatures. The end result is a brown tile. It should be noted that there is no standard in terms of shape and size. Manufacturers today offer a rich range in this regard. I would like to mention the glazed tiles, the blank of which is smeared with glaze before firing. A shiny glossy surface is obtained on the surface of the finished product.
As for the assortment, you can list the most popular models:
-
tape flat;
-
tape groove;
-
one- or two-wave;
-
grooved and others.
Not long ago, most recently, they used tape-type shingles, which were laid in two layers to ensure that leakage was avoided. Today it is not necessary to do this, because material of the mortise type has appeared.
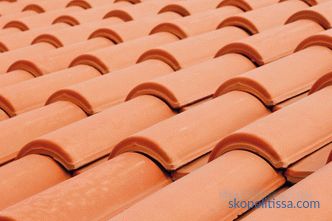
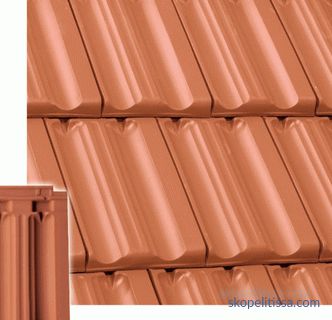
In the construction of this variety there is a groove on one side and a thorn on the other. When two adjacent elements of the roofing are connected, the spike of one is inserted into the groove of the other, which ensures one hundred percent tightness of the joint. In this case, the design of the tile is the so-called eyelet. It is located in the lower plane. Its purpose is to fasten piece material to the crate with wire. It is not necessary to fasten each element, wire is tied with tiles through the row vertically.
It is believed that the main disadvantage of ceramic tiles is its large mass. That is, under this roofing will have to build a powerful truss system and crate. But on the other hand a lot of weight - this is a good resistance to the wind. Even squalls will not tear the roof. Most likely, the main disadvantage is the high price.
Cement-sand tile
The analogue of the classic was specially invented. The reason is to make the roofing material cheaper and make it massively affordable. There was only one way out - to remove the burning stage from the technological process, in which the main costs are reduced to the consumption of expensive energy carrier. But the clay does not become strong if it is not burned. Therefore, it was replaced by inexpensive, but affordable ingredients: sand and cement, which together created a durable, long-lasting material.
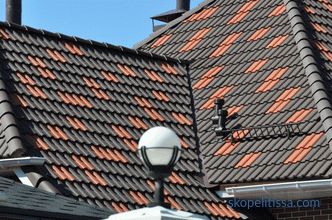
It should be noted that in the process of firing there is no, but there is a stage of drying at + 600С. Even this turned out to be cheaper. In all respects, the cement-sand variety is not inferior to the ceramic one. There is even superiority - a variety of colors, which is achieved by applying paints on a polymer base. Paint and varnish products of this type provide both protective and decorative functions.
On our site you can find contacts of construction companies that offer services design and repair of the roof . Directly to communicate with representatives, you can visit the exhibition of houses "Low-rise Country".
Polymer sand tile
This product consists of three components:
-
sand (70%) , giving strength to the product;
-
polymer , usually waste polyethylene, acting as a binder element (25%) ;
-
the rest dye , giving the material the necessary decorative effect.
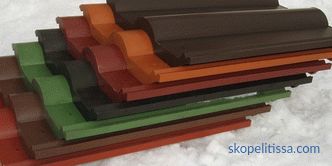
The production process of polymer-sand tile is based on pressing a heated mixture under high pressure. It turns out a very durable product, which in all respects will not yield to either the ceramic variety or the cement one. It even surpasses its competitors in color design, where all the colors and shades are present.
Technology for mounting tiles
Note that a roof made of tile (any) is assembled almost the same technology. There are, of course, certain differences that relate to the shape and design features of the material. But the basic sequence of operations is the same.
Any installation process begins with design and calculations. Both stages are not easy, the quality of the final result depends on them, therefore professionals should deal with it. The only thing to note is that in the process of making the calculations, the amount of the required roofing material is determined, as well as the number of additional elements: ridge, valleys, curtain rails, ventilation grilles and other things.
Be sure to carry out the calculation of the truss system. The tile is heavy material, which means that you will have to install powerful rafters and elements of the sheathing under it. Therefore, at the design stage, the sections of the required sawn timber, the step of their installation are calculated.
It may be interesting! In the article the following link read about the minimum angle of inclination of the roof of metal .
Assembly of rafter legs
In principle, here is a standard construction operation. The main thing to consider is:
-
the correct geometry of the truss structure on each roof slope;
-
the upper ends of the rafters should be located in the same plane;
-
the same applies to the batten, here the deviations should not exceed 5 mm per 2 m of the element length.
An important point is the ratio of the step of mounting the rafter legs with the cross-section of the battens. The ratio is:
-
if the installation step of the rafters is up to 75 cm, then the crate can be assembled from bars with a section of 30x50 mm;
-
the step is 90 cm , section - 40-50 mm;
-
pitch - 110 cm, section - 40x60 or 50x50 mm.
Now a drip is mounted on the installed crate. This is a metal strip in the form of a corner. It closes a part of the roof overhang, the purpose is to prevent condensation and precipitation from entering the roofing space.
Previously, roofing from tile was going to be quite simple. Basically, the masters sought to properly lay the elements of the roofing to create a sealed plane. Today, more and more attic space is made warm. That is, between the rafter legs heat insulation material is laid, which from the upper side is covered with special films that can withstand leakage.
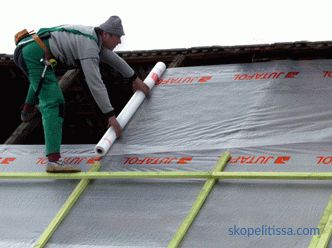
Even if the project does not have a warm under-roof space, these films are still applied, that case, if suddenly the tiled roof will leak. How it is carried out:
-
waterproofing film is placed along the rafters in strips, starting from the overhang, moving to the ridge of the roof;
-
waterproofing strips are laid overlapping 10-20 cm, the top strips over the bottom;
-
the film joints are closed with adhesive tape;
-
the insulation is attached to the rafters with small carnations with a wide cap or metal staples using a stapler.
After that, a counter lattice is placed along the rafters over the laid film. Its purpose is to create a ventilated gap. And already mounted on top of the crate. And on this we can assume that the assembly of the truss system is completed.
In the video, the expert talks about the vapor barrier film that is used for laying under the roofing material:
It might be interesting! In the article on the following link, read about the characteristics of the "Cascade" metal tile, how it differs from other models.
Installation of the drainage system and additional elements
The next step is the installation of a drain. It lies in the fact that you need to install the brackets on which the gutters of the horizontal part of the drainage system will be installed later. Bracket mounting technology depends on their type. More often, these are elements with a long leg that are attached to the lateral ends of the rafter legs.
The brackets are installed with a slope of 2-5 °. Fastening is carried out with wood screws.
As far as dobori is concerned, before the tile is assembled on the roof, first of all, the valley is formed, if there is one in the roof structure. The junction of two slopes is closed with polymer-bitumen rolled material, and a metal element is placed on top, which is attached to the truss system. The length of the corner elements is 1 m, therefore, along the valley end, they are overlapped with a length of 10 cm, starting from the lowest point to the ridge. Fastener - roofing nails.
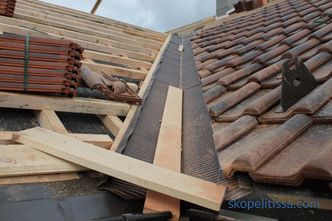
The important point is that the end of the valley end (between the tiles) should not be less than 15 cm in width.If this parameter is reduced, then it is likely that a large amount of water will collect in the valley. And this will certainly lead to leaks.
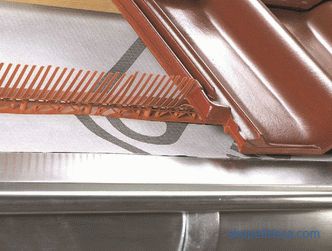
And the last additional element at this stage is the ventilation grille covering the space between the roof system and the walls of the house. To do this, use a different type of lattice materials made of plastic or metal. Each model has its own method of installation. The main thing is to install them so that the opening is tightly closed. That is, the air through it will pass unhindered, and for debris, birds and insects - this is a formidable obstacle.
It might be interesting! In the article on the following link read about , how to choose a country house for permanent residence: properly prioritize .
Installation of tile
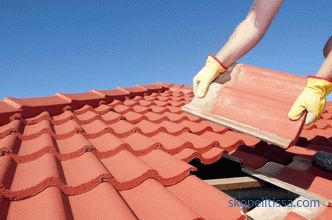
So, we proceed to the main stage - the connection of the roof and tile. Let's face it, this process is not easy. From the master requires knowledge of technology and experience of this type of work. The only thing to note is that there are certain requirements for the installation process itself. Here are some of them:
-
laying begins from the overhang to the ridge, from the side of any corner of the building;
-
if the roof hip or hip , then installation starts from the middle of the ramp;
-
one tile should lie on two elements of the batten;
-
fastening is carried out in different ways, but more often by self-tapping screws through mounting holes in the roofing material.
Note that the holes are not through. That is, if there is a need, then they are drilled through. If the tile will not be attached to the crate, then there is no need to make holes through. This ensures the integrity of the roofing.
In fact, it is quite difficult to convey the assembly process in words, therefore we suggest watching the video
The video shows the installation process of ceramic tile:
Installing the tile on the ridge of the roof
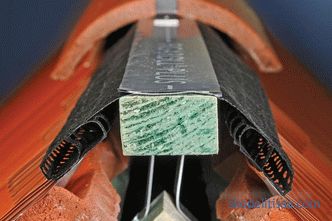
For this, an additional element made of using the same technology as the tile itself. He has a peculiar shape that helps to close the horse sealed. But since the latter is used in the roofing system and as an element of the ventilation system, it is first mounted a bar on it with special brackets, the aeration element is installed on top of it in the form of a mesh element. It closes the ridge of the roof, leaving openings for air to escape from under the roofing space.
And already after this, ridge complementary elements are mounted. They are attached to the ridge bar with kleimers, because it is this fastener that can ensure the tightness of the ridge assembly. Dobory themselves are assembled as a socket. That is, on the one hand, they have a larger diameter seat, on the other, a smaller one.
Installing ridge tiles
This step applies if homes erected hip or hip roof. Only in these structures there are ridges - the joints of two slopes forming an outer ledge. He, like other protrusions or concavities, is a place of intense exposure to natural precipitation. Plus, this section produces a joint of two stingrays. Therefore, it is very important to conduct a good sealing. We will not describe how to do it correctly. Just watch the footage.
The video shows the technology of covering the ridge of the roof with ceramic tiles:
It can be interesting! In the article follow the link read about the original tree house .
Conclusion on the topic
The tiled roof looks presentable. It is impossible to argue with this. She emphasizes the status of the host. Because the roofing material itself is not a cheap pleasure. Plus, under it will have to lay a powerful truss system. And this is also a lot of money. Yes, and the service itself installation of tiles on the roof will cost expensive.
