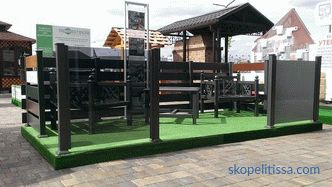
At today's time, fencing made of corrugated board is practically the most common, due to the relatively simple installation, durability, aesthetics and the variety of colors and shapes. Sheets are made of galvanized steel by cold rolling and painted. Sheet sizes for each manufacturer is different. The most common has dimensions in width 1150 mm, useful width 1100 mm, as it is mounted "overlap". For fences the usual professional flooring with marking of C10 and more rigid C21 is used, but the main thing is to choose the correct base for a fence from a professional flooring.
Types of the foundation for the fence
The main factors when choosing The foundations are:
-
Groundwater level in the work area. The closer they are to the surface, the more thoroughly they will have to build.
-
Calculation of the "sail" sheets.
-
Type of soil. The softer and wetter the ground, the deeper you need to lay the foundation.
-
The presence of a number of busy highways and railways. Heavy transport causes vibrations in the soil, causing the fence to collapse.
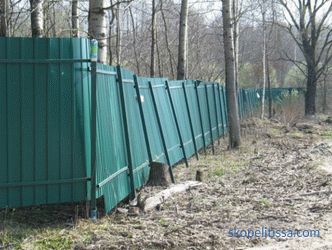
There are several types of foundation:
-
Columnar. This is the easiest and easiest to perform. Its essence is that pits make the necessary depth, into which the vertical supports of the fence get hammered and the cavity is concreted.
-
Belt. When constructing the foundation, a trench is digged, a cavity is reinforced, vertical supports are installed, and concrete is poured.
-
Tape-column. This is a combined type of foundation in which a trench is dug between the pillars and is poured with concrete after reinforcement. The pillars can be either monolithic or made of brick or cinder block. For greater aesthetics, you can finish facing stone.
-
Stone. The most expensive and time-consuming type of fence, but the most reliable. The foundation is laid out of rubble stone and poured with concrete, after inserting supports. From the stone, you can also lay out the columns of the future fence.
The most common, reliable and durable is considered to be a fence made of corrugated flooring on a strip foundation. The strip foundation is the most suitable for this fence.
On our website You can find contacts of construction companies that offer a fence construction service. Directly to communicate with representatives, you can visit the exhibition of houses "Low-rise Country".
Stages of building a strip foundation and installing a fence
Marking and digging up the trench
The first step is to mark the location of the fence so that it does not extend beyond your land, as after the foundation of the foundation it will be problematic to transfer it.
For marking on the perimeter, pegs are hammered and a strong twine is tied. Next, you need to remove the entire length of plants and shrubs. After that determine the installation site of the pillars. For this, the tape measure from the corners measures the same distances, depending on the factors that were indicated above. It is necessary to consider the length of the gate and wicket.
Next, digging a trench 30-40 cm wide and 70-80 cm deep from the surface of the earth. This is done with a narrow excavator or manually. It all depends on the type of soil and the desired speed of construction. In the presence of rocky soil, a hydraulic hammer is used or, in the manual version, a jackhammer is used. In this case, the depth of trenches in such hard rocks can be reduced.
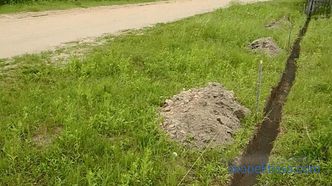
Then a sandy “cushion” is made with a layer of 10-20 cm. It must be compacted. It will serve as the foundation of our foundation and provide the necessary drainage.
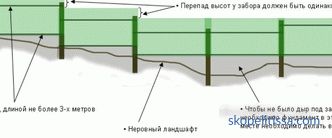
With uneven terrain, it should be noted that one section of the fence should be at the same level. In such cases, the fence is "steps".
Installing formwork
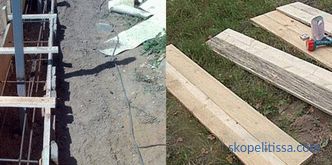
When arranging formwork, assembling carried 20-30 cm above the ground. It can be made of planks, metal sheets, plywood or professional formwork plywood, which will allow to separate it when the concrete dries out.
The uneven terrain adds difficulty in installing the formwork to make the foundation for the fence of the flooring. Since one section will have one elevation, it is necessary to install the formwork at the planned height. Sections in this case are divided among themselves with the help of the same formwork.In this case, each branch will be further filled with concrete in stages. Naturally, reinforcement of concrete will be somewhat more complicated than with a flat surface.
It might be interesting! In the article follow the link read about fences to give.
Installation of supports and reinforcement
The next stage is to install vertical supports for the future fence. A steel corner or square profile of 30-40 mm is usually chosen. To increase the service life of the support and longitudinal lags, it is necessary to prime and paint, after cleaning the corrosion centers, if any.
The supports for the fence can be as shown in this video:
The supports are hammered into the trench at a distance of 2 - 3 meters and a depth of at least 20-30 cm. In the presence of rocks, a hole is hollowed out under each support, which, after the installation of the support, is either separately concreted, or filled with soil and compacted. In this case, it is necessary to set up supports to ensure their verticality prior to pouring with concrete. The distance between the supports are selected depending on the area of work and the height of the fence itself. Usually it is 2.5 - 3 meters. In windy areas, such a fence works like a sail, and at greater lengths it is likely that the sheets will deform or tear them away from the attachment points.
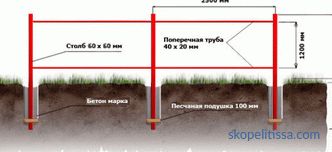
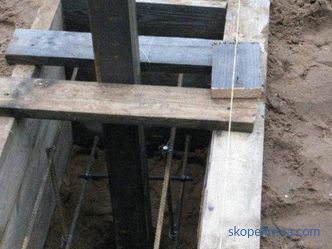
To increase reliability, 10 mm diameter reinforcement is welded between the supports in the trench. With great depth, several such binder compounds should be made at different levels.
Reinforcement is also performed using reinforcement 8-12 mm. Since the foundation does not carry almost any load, except for the side, then a special approach is not required. It is mainly required to ensure the integrity of the structure. Between the supports, segments of reinforcement are driven in and along, with knitting wire, 2-4 rows of reinforcement are imposed, depending on the depth of the trench. For even greater reinforcement impose cross. It is necessary to take into account that the reinforcement should be at a distance of 2-3 cm from the edge of the formwork.
It might be interesting! In the article following the link read about the blocks for the fence.
Concrete work: foundation sludge and stripping
Next, you need to fill the trench to the required formwork with concrete or mortar using cement of at least 200. The strip foundation for profiled sheeting is poured in layers to provide air bubbles from solution. As the concrete dries, it is necessary to water it. During the first two or three days it is desirable to make it every 3-4 hours. Watering will avoid cracking. Then you can less. The dismantling of the foundation is carried out depending on the temperature conditions when concrete is 70% strong, which is 2-4 days. At use of the additives accelerating hardening removal of a timbering is possible also in a day. However, the installation of the fence should begin no earlier than 7 days.
Installing the longitudinal profiles and fixing the sheets of the professional flooring
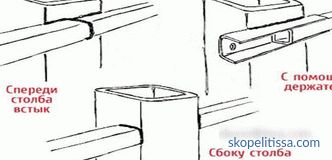
This step involves welding the profiles between the supports of the fence. It can be made both from a corner of 2-3 cm, and from the "P" shaped or square profile. It uses several types of connections, as shown in the figure. If painting is not done in advance, then after welding it is necessary to paint the frame of the future fence. Especially when painting, attention should be paid to welds, as this is where corrosion occurs most often.
After that, sheeting is installed using self-tapping screws with rubber pads to avoid damage to sheets and the occurrence of rust in attachment points. The distance between fasteners depends on the size of the sheet.
To improve the appearance, the foundation can be trimmed with tiles, facing bricks or stones, just plastered and painted.
Review of the process of building the foundation and installation of the fence mono look in the video:
Frequent errors during construction
Insufficient depth of foundation laying , so that the fence can "float", warp and burst. This is especially characteristic of wetlands with close groundwater storage (near reservoirs, ponds, etc.).
It might be interesting! In the article on the following link read about decorative fence posts.
Conclusion
The same consequences can occur if the layer of sand or gravel cushion under the foundation is insufficient or has been poorly rammed. And, of course, poor-quality reinforcement can lead to cracks and chipping of concrete.In general, it can be said that the preparatory stage, prior to pouring with concrete, can be considered central in the construction of a high-quality fence.

