The article contains information about the technology of roofing with shingles. Disassembled roofing of soft tiles, technology laying bitumen shingles and the nuances of the installation process. Having assimilated the information received, you will know what the masters will do and in what sequence and ask the right questions that will show that you understand the topic.

Crate for soft tiles
You need to start by disassembling the crate. Since shingles - the material is flexible and thin, it, lying on any plane, exactly repeats all its forms. Therefore, installation of a flexible roof is carried out only on a continuous crate, collected either from boards, or from sheet or plate materials, for example, from moisture-resistant plywood or OSB.
The board crate is laid on the roof truss system, leaving a gap of 1 cm between the boards. This is the so-called compensation gap in case of moisture and temperature expansion of sawn timber.
Plywood and OSB boards are stacked on a thinned crate of boards 20-25 mm thick and 100 mm wide. The step of installation of boards depends on the sizes of the stacked sheets or plates. For example, if plywood 125x125 mm is selected for a continuous batten, then the installation step of the batten components should be within 70 cm. The sheet of plywood should lie on the two outer planks, and there must be another between them. That is, the plywood sheet must lie on three boards, at least.

And two important points:
-
between stacked plates or sheets leave a gap of 1 cm;
-
the panels are laid with an offset of half the element, thus achieving a uniform distribution of loads on all sheets (plates).
Technology of installation of shingles
Like all construction processes, laying of bitumen tiles is divided into two stages: preparation, and direct installation of roofing material.
On our website you can find contacts of construction companies that offer roofing services of any complexity. Directly to communicate with representatives, you can visit the exhibition of houses "Low-rise Country".
Preparatory work
The first preparatory operation is the installation of a drip. This element, made of painted galvanized steel sheet, represents a corner of up to 3 m. The width of each shelf varies between 15-25 cm. The purpose of the dripstick is to reinforce the ledge overhang and create conditions under which the water flowing from the roof would not fall under the crate .
The drip is attached to the crate with roofing nails, which are hammered into the upper shelf in staggered order every 15 cm. Neighboring bars are overlapped with at least 3 cm.

Installation of the under-roof (underlay) carpet
First of all, what is the under-roof carpet. This is a roll material from the category of bitumen-polymer. It is laid on the crate so that:
-
Align minor defects of the batten laid on the rafters.
-
Increase the waterproofing quality of the roofing.
-
Prevent condensation from forming on wooden flooring.
So, the technology of laying soft tiles on the roof begins with the installation of under-roofing material. First of all, its stripes are laid on the valley and eaves. But we must begin with the valley. The lining material has a width of 1 m, so it is laid out so that it covers the slopes from endova in two sides of 50 cm. At the same time, this type of material is self-adhesive, therefore, the crate under it is not treated with adhesive compounds.

On our site you can get acquainted with the most popular projects of houses in the decoration of which the ventilated technology was used facade - from construction companies represented at the exhibition "Low-Rise Country".
Then lay the cover on the overhangs along the eaves. In this case, the vertical hanging shelf of the drip is covered by half. Next, close the remaining open area of the roof slope with rolled material.Here are a few nuances:
-
strips of the roofing carpet are placed on the already laid (on the eaves and on the valley) so that the horizontal joints overlap 10 cm, vertical 15;
-
galvanized nails are hammered into each overlapped strip at overlap points, i.e. fastener heads should remain under the edge of the adjacent strip, fastener pitch is 20-25 cm;
-
lining strip carpet, which cover the main part of the slope, laid perpendicular to the eaves and ridge of the roof, starting from the bottom, rolling the roll up;
-
each wasp fastened by nails perimeter;
-
to enhance the edge sealing strips joints promazyvayut bituminous mastic.

After the roofing carpet is fully laid, gabled slats. They close the edges of the laid material along the slope and will not allow moisture to subsequently penetrate under it. Installation of slats produced in the same way as in the case of the eaves.
Now it is necessary to strengthen the waterproofing qualities of the valley, because this element is subjected to the greatest loads from rain and melting snow. For this purpose, an end carpet is used - a roll-type material made on the basis of a rubber-bitumen composition reinforced with polyester mesh. It is selected in the color of shingles.
It is simply laid out on the valley, gluing to the lining carpet with bitumen mastic, which is applied under the edges of the material with a width of 10 cm. Additionally, the laid strip is punched on the edges with roofing nails. The spacing between fasteners is 20–25 cm, the distance from the strip edges is 3 cm.

It can be interesting! In the article on the following link read about bitumen sealant for repair work.
Installation of bitumen tiles
The preparatory stage of the roofing of shingles is completed. You can go directly to the laying of the roofing material. The first operation at this stage is the installation of the starting tile.
In principle, where to start laying (from the middle of the eaves or from the edge), there is no difference. But experts recommend installation with long eaves start from the middle. Thus it is easier to level the starting strip horizontally.
What is the start bar. This is the same ordinary tile, which has cut petals. Although many manufacturers produce a universal element that covers the eaves of the roof and its ridge.
The laying of the starting strip is made along the eaves, retreating from the edge of the overhang 1.5-2 cm. At the same time, it must necessarily close the gable strips with the edges. This element is a self-adhesive material. But it must be pierced with roofing nails in the corners and along the perimeter every 20 cm, retreating from the edges of the strip 2-3 cm. If ordinary starting tiles are used for the starting strip, on the reverse side of which there is no adhesive composition, then the laid lining carpet for the strip installation site is obligatory coat with bitumen mastic.

Installation of ordinary tile
The main requirement for laying the first row of soft tile is indent from the bottom edge of the lining carpet is 1 cm. An important requirement is correct nailing the material. The fastener should not crash into the roofing material, it should press it to the crate. Therefore, to strongly nail or do it obliquely.
At the same time, each bitumen tile is nailed with four nails. Place clogging - 2.5 cm from the upper edges of the petals. This is done so that the nail heads remain under the roofing element made of soft tile. If the slope of the roof slope is more than 45 °, then the roofing material is punched with six nails.
Now, as for the laying pattern of ordinary tiles. It all depends on the model of the material used. For example:
-
the “Jazz” model is laid regardless of the arrangement of the petals;
-
the “Trio” and “Sanat” models are mounted with an offset to half petal.

It can be interesting! In article on the following link read about the heating cable for the roof.
Making Endy
First of all, form the Endy area, into which the nails cannot be hammered. This distance is 30 cm in each direction from the axis of the valley. This is the most vulnerable place where the accumulation of water is always great. Therefore, it is forbidden to make any holes in this area.
But the tile itself is laid, closing the area of the valley with a small gap of 5 cm. Only in areas where it is impossible to use nails, bitumen mastic is used. Therefore, these areas are treated with it, causing a width of 10 cm, and laid tile.
Design of the gable
Here the technology is the same:
-
the installation is made so that there is a gap of 1 cm from the edge of the laid plank to the roofing material;
-
flexible tiles are glued to the base and metal strip with mastic and simultaneously fixed with nails.
Connection to the pipe
Chimney, ventilation pipes - elements that are present on the roofs are mandatory. The most dangerous area is the joint of these pipes with roofing material, so it must be tightly closed.

To do this, make a pattern from end material or sheet metal, covered with protective paint. But previously, the pipe walls are closed around the perimeter with sheet iron, which is fastened to the pipes with self-tapping screws. The height of such a plinth should be 30 cm.
Cut a 50 cm wide strip out of the end carpet. It is laid near the pipes so that it covers the baseboard (30 cm) and the laid bituminous tile (20 cm). The strip fastening method is bituminous mastic.
An important point. First, the lower side of the pipe is closed (meaning the lower one along the slope), then the two side pipes with the approach to the lower side, and at the end the upper side with the entrance to the side ones.
Next, the tile itself is laid, spreading the laid end material with mastic. From the sides of the pipe, the tile is laid so that it does not reach the pipe 8 cm. It remains only to mount the metal strips, which are installed so that the visor is formed above the pipe walls. Therefore, the shape of the slats Z-shaped. On the pipe they bite down the strobe, where they sink the upper shelf of the element. To the pipe itself straps attached with screws. After which the junction strokes filled with silicone sealant.

It might be interesting! In the article at the following link read about the membrane roof - its features and installation nuances.
Sealing roofing passages
Small pipes, antennas create joints in the roofing cake through which water can penetrate under the roofing structure. Building a roof of soft tile, you must take into account these passages. For their sealing use special rubber caps. They are laid so that they with the lower edge went to the laid tile by 2 cm. On the lining carpet make a mark where you need to cut a through hole under the passage.
-
Cut a hole with an electric jigsaw.
-
Bitumen mastic is applied on the back of the cap.
-
The cap is laid in place.
-
Fix it with roofing nails, punching along the perimeter.
-
A layer of mastic is applied on top of the cap skirt.
-
Install soft tile.
-
The joint of the roofing material and the cap is filled with sealant, which is sprinkled with stone dressing on top.

Skate clearance
Use a universal skirt to cover the roof ridge the element that was used as the start bar. It is simply cut into three parts, each part is laid along the ridge across, dangling the edges from each slope, and nailed to the crate with roofing nails. The cut parts are laid from the bottom to the top along the inclined edge of the ridge with an overlap of 3 cm. In order for the cut parts to be bent well along the ridge, it is recommended to warm them up a little with a building hairdryer.

Special ridge elements are used to provide ventilation of the roof, in the construction of which there are slots or holes. Through the last and there is an outflow of air from under the roof structure.
The ventilating element is installed on the ridge, fastened to the crate with nails, and then the shingles are glued on top.
How to install shingles on the roof in the video:
For errors in installing shingles, see the following video:
It can be interesting! In the article on the following link read about "the house of the dancing light".
Conclusion on the topic
So, the roof of soft tiles is ready. No other operations are required anymore. The main task of the manufacturer is to strictly follow the instructions that are attached to the roofing material. It is necessary to pay attention to the fact that there are certain additions or changes in the conducted technology for each model of tiles. They are also indicated in the instructions.
Search
Related Articles
technology, mounting method, installation procedure, nodes
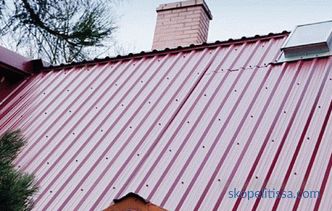
Today we will talk about such a popular building material as profiled. About its advantages and disadvantages, where it is used, and the installation technology on the roofs. After reading the artic...
Provence style - the original French design of country houses

The hot southern sun, endless vineyards and fields fragrant with lavender, Beaujolais wine festivals - all this is alluring and romantic Provence. This French province is very popular among tourists...
Siding roofing - a variant of an inexpensive and beautiful covering
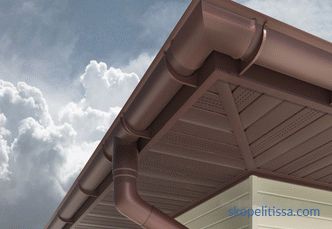
When the walls and roof with a roof covering are ready, you need to think about finishing the overhangs of the roof frame. Some owners leave it without additional filing, but the uncovered places no...
Outdoor BBQ oven: diagrams, drawings, stages of work
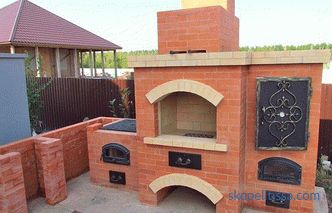
In a private house, a brick brazier is often preferable to a regular metal one. The article discusses the features of brick braziers, their structural differences that affect the choice of laying pa...
Flat roof slope. How to calculate the slope of a flat roof
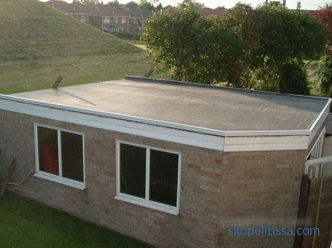
Choosing the type of roof, determining the angle of inclination and other roof parameters is an important and crucial task, requiring knowledge of the standards and consideration of the climatic fea...