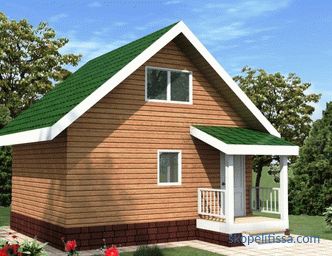
An external roof drain is an important system for protecting a building from rain and melting snow, because its purpose is to collect water from the roof slopes and divert it into storm sewers. The article considers what kind of drainage systems are and what principles they are mounted on roofs.

Types of drainage systems
In total, there are three main varieties:
-
Unorganized external drain. In fact, it is a roof cornice that is extended beyond the wall, at least half a meter.
-
Outdoor organized drain from the roof. This system, which includes trays, they are horizontal gutters, and vertical pipes installed in the form of risers.
-
Organized internal . This system is used only on flat roofs. About this species will tell in a separate section.
And now we will deal with the external drainage system.
External drainage system
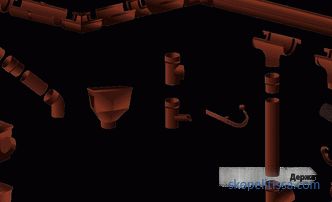
As already mentioned, it consists of: gutters, located under the edge of the roof covering, pipe risers. Both parts of the system are interconnected by funnels. In addition to these elements, the drainpipe includes:
-
brackets , like gutter fasteners;
-
clamps , with which the pipes are attached to the walls of the house;
-
couplings , which are used to connect the gutters and pipes;
-
pipe outlets on 90 and 45 0 ;
-
drain pipe used in the lowest part of the effluent.
Materials for drain
Today, manufacturers offer two materials the gutter elements of which are made: galvanized steel (painted or coated with a polymer layer), plastic. Note that metal products are more expensive, but they will last longer on the roof. As for the technology of installation and assembly, both varieties from each other do not differ.
But plastic drains are not as noisy as metal, besides they are neutral towards slightly aggressive environments. Today, manufacturers offer a drainage system of polyvinyl chloride and a special kind of vinyl. The latter is the owner of high performance. The pipes and trays made from it do not crack when it is freezing, which often happens with PVC. Therefore, they are recommended to use in the northern regions of the country.
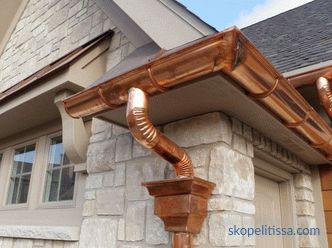
It should be noted separately gutters from copper. Expensive option with a long service life. And in terms of decorative qualities, it surpasses plastic and galvanized, although the latter two are represented on the market by a huge color scheme. Unfortunately, in private housing construction, copper products are rarely used - it is too expensive for many.
How to correctly calculate the external water drainage system
This mainly concerns the elements of the system . The number of gutters depends on the length of the eaves of the roof. For example, if the gable roof is 10 m long, then the length of the cornice is 20 m. Accordingly, the length of the trays to be acquired should generally be 20 m. And since the standard length of the gutter is 3 m, it means that the number is determined as follows: 20: 3 = 6.6, round up - will be 7 pieces.
The pipes are a little different. First, the length of the riser depends on the height of the wall of the building. Secondly, the number of pipes depends on how many risers will be installed on the roof. Here the ratio is:
-
if the length of the eaves of the roof is within 10 m, then mount the one riser ;
-
if more of this magnitude, multiple risers .
But in the latter case it is taken into account that the distance between the risers should not exceed 20 m. Knowing the height of the wall and the number of pipe risers, it is possible to determine the number of pipes on the basis that one pipe has a length of 3 m
By the way, the number of risers determines the number of funnels and bottom drain pipes. They are equal in quantity to each other. But there will be twice as many taps.
On our site you can familiarize yourself with the most popular sites in the Moscow Region for the construction of suburban home . In filters you can set the desired direction, the presence of gas, water, electricity and other communications.
As for the brackets for trays, their number is determined by the installation step of fasteners equal to 50-60 cm. But keep in mind that the first and last bracket is installed from the edge of the grooved construction at a distance of 30 cm. As for pipe clamps of the risers, the distance between them is 1.8-2.0 m. But if the wall height exceeds 20 m, then the installation step is reduced to 1.5 m.
These were the calculations of the number of elements. But there are also overall parameters - this is the diameter of the pipes and the cross-section of the tray.Since the standard size presented by manufacturers corresponds to the standard parameters of pipe products, respectively, the drainage capacity of the drain elements is different. There is a simple relationship here - the larger the area of the roof slope, the greater the drainage system should have. And it depends on the diameters of pipes and trays. Therefore, we offer the ratio of the slope area and the diameters of pipes and trays:
-
to 30 m² - pipe diameter is 80 mm, trench diameter is 100 mm;
-
30-50 m² - 87 mm pipe, tray 100-120;
-
50-125 - 100 and 150 mm respectively;
-
Over 125 m² , 110 mm tube, 150-200 mm gutter.
The video tells how to calculate the number of elements of the external drainage system:
Drainage installation rules
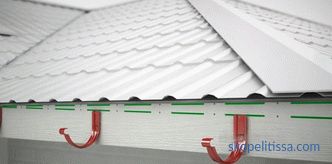
The external drain is a gravity flow system, therefore the gutters are laid at an inclination of 2-3 mm per 1 m of the length of the flute path. This important fact is taken into account in the process of installing the brackets. This is done in such a way if, for example, two risers are installed on the corners of the building on the wall.
-
The middle of the eaves is determined.
-
He received tags in two different directions lay 30 cm each.
-
In these places they are mounted on bracket at the highest point. Two fasteners should be located on the same horizontal level.
-
For example, if the length of each part is 10 m, then inclination of the grooved construction is determined by according to the following scheme: for each meter 2 mm, turns out to 10 m 2 cm.
-
Backing from the edge of the corner of the house 30 cm and at this point mount the bracket, which is 2 cm below the already installed one.
-
Now between the two brackets they pull the strong thread . It is located at a slope of 2 °.
-
Exactly according to it intermediate brackets are installed with a step of 50-60 cm.
-
So brackets are installed both sides of the middle of the eaves.
It can be interesting! In the article on the following link read about country house from CIP panels - comfort and coziness at an affordable price .
It remains to lay the trays over the brackets. Today on the market you can buy a gutter with a socket connection and coupling. The first is simpler, less additional elements. On the one hand, in the construction of each groove there is a reduced diameter that fits tightly into the other side of the tray, where the diameter is standard. It is recommended that the joints between the two grooves be treated with silicone sealant to increase the tightness of the joint.
Caps are installed at the edges of the trays. In the installation site of the pipe risers mounted funnel. By the way, outdoor water intake funnels are represented on the market by two constructive views: a standard funnel and a chute with a branch pipe, which enters the riser pipe through the socket system.

Installing the risers
It is easier here because the riser is set vertically. That is, it is necessary from the funnel to the ground on the wall to postpone the vertical line with a plumb line. Then mark up the installation of clamps, which are immediately attached to the wall with anchors or screws on plastic dowels.
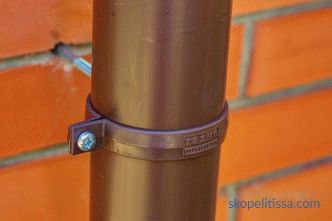
There are several points to pay attention to:
-
The bottom clamp is installed at the junction of the drain with the pipe.
-
The lower end of the drain connection must be located above the ground level at a distance of 25 cm. This is exactly the reference point of the marking.
Now how to properly connect the pipe riser to the drain funnel for external drains. Since the length of the eaves in different roofs has a different size, the segment from the funnel to the riser will also be different. First of all, here we cannot do without two taps. Secondly, if the length of the eaves is large, then between the taps it is necessary to install a piece of pipe from the drain.
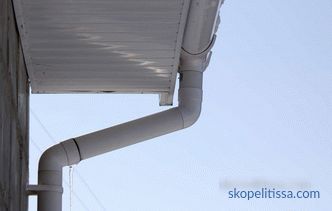
In fact, the installation process is not very complicated, if you exactly follow Items provided above. Masters in one working day quietly assemble the drainage system of one house. That is, time is running out.
We offer to watch the video, which shows the entire editing process, so to speak, from "A" to "Z":
It can be interesting! In the article on the following link read about materials for cladding the facade of the house .
All about the internal drain
So, let's proceed to the topic - the internal drain of a flat roof.It is called so because the vertical pipe, through which rainwater moves down the sewer from the roof slope, is located inside the building. And on top of the roof set a special design funnel. It is covered with a strainer to prevent debris from getting inside the drainpipe.
There are some requirements for internal drainage:
-
for each 150-200 m² of the slope , set one funnel;
-
in the direction of the funnel slope stack at an inclination of at least 4 °;
-
diameter pipes choose from the calculation - 1-1 , 5 cm² of its cross section per 1 m² of roof area;
-
a soft roof is laid on the sides of the funnel ;
-
The riser should be located in a heated room;
Note! The riser is connected to a branch pipe, which is laid at a slope of 2-5 ° towards the storm sewer under the house into it pipe and bumps;
-
you can not install a funnel near the wall of the building.
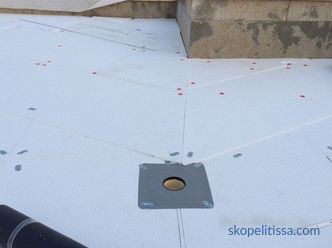
Begin construction of the internal drainage system before the foundation is laid. That is, stack the discharge pipe. If the foundation is already poured, then a hole is made in it with a perforator to the diameter of this pipe, where the latter is pushed. Today, often, a horizontal drain of the drainage system is laid under the floor of the first floor house or in the basement under the ceiling. This greatly simplifies the installation process. But here, in any case, you have to make a hole in the foundation. In order not to do this in the foundation structure at the stage of its construction, it is better to leave a hole by inserting a larger diameter pipe when casting.
The riser is installed inside the premises. Therefore, it is determined in advance in the project the place of its passage through the ceiling, in which through holes are left or made. Subsequently, after mounting the drain, they are sealed and insulated. The main task of the manufacturer is to carry out installation with full sealing of the joints. Therefore, the joints between the pipes among themselves, as well as with the fittings, are necessarily treated with silicone sealant. It is required to leave at least one revision in the riser. This is in case of littering of the drain pipe.
The most important stage in the construction of internal drainage is the installation of a water intake funnel. One hundred percent sealing is required here so that precipitation does not penetrate under the roofing material.
See in the video what requirements are placed on the water intake funnels of the external drainage system:
It might be interesting! In article on the following link read about modern cottage decorated with cedar .
Conclusion on the topic
So, we tried to give complete information on the external drainage system and touched on the topic of internal drainage. In fact, this system is simple, because it consists of only two sections, and its configuration is not wide. The main thing is to connect the parts of the system precisely. Although this is easy to do, because manufacturers have taken care of the maximum ease of assembly.

