Many landowners before construction think about how to build a house, cottage or other object that is not only functional, but also aesthetically beautiful. Hip roof is suitable for creating a residential or non-residential attic and give beauty to the object. This article describes how to make a system from the rafters, take into account all the nuances in the calculations and make the installation without errors.

Features and design of the hip roof of the hip roof type
The hip roof most often consists of four ramps. They line up at an incline on the outer walls of the building. Two parts - the side, like a standard roof, and the remaining two are installed between them. In this design, two vertices (instead of the standard one), which connects the ridge.
Vertical slopes, in shape - triangles, and are called hips. The other two gables, mounted on the longer sides of the object, are trapezoidal in shape.
The hip roof has the following characteristics:
-
high strength indicators;
-
durability;
-
thanks to the original and streamlined form, protection against winds is obtained.
Such a roof is ideal for organizing living space in the attic of a house. Make skylights on it easier.

Dutch hip roof
When the length of the hip is less than other lateral ramps, this model is called the Dutch (or half-hip). This form withstands strong gusts of wind and does not accumulate snow precipitation.

Danish roof
It differs in that it is a half grip - This is the lower part of the triangle full hip, and the upper part of the triangle is used under the glass.

Hip hip roof
This model has one vertex which connects four equal parts of the roof. Outwardly, the hip version is similar in shape to the pyramid.

Broken roofs
Such spectacular and complex to create a roof to calculate and install yourself (without prof. training) is not recommended. They consist of a large number of skates, which are placed at different angles of inclination.
The device of a complex hip roof on a house of aerated concrete is shown in the video:
Hip roof: device, knots and hip roof strengthening
The device of the hip roof basically consists of two elements: a frame of rafters and a power plate. The logs connected in a single system are attached to a power plate mounted on the top of the outer walls of the building.

The hip roof consists of the following elements:
-
Corner rafters . These are standard power "legs" that connect the corners of the building with a ridge bar. Most often in projects four beams are used, the same thickness as the ridge. They are attached to it with one edge, and the opposite is displayed outside the walls of the building.
-
Fad . This is the main carrier axis and the highest point of the roof, where all its sides are connected. Usually the center of the ridge, there is the center of the entire roof in the hip project.
-
Short rafters . These logs, or wooden beams, are attached to the mauerlat by one side and the other to the angular truss legs. Their number depends on the area of the roof.
-
Linear frame . These are 6 rafters occupying a central location and intermediate. They are attached to the ends of the ridge beam and put on the bearing walls of the object. They are built on all sides of the building in the frame number.
-
Intermediate frame . These rafters are fixed from the ridge beam and placed on the power plate. Hips are not involved.

Gain
For long-term use, not only a strong system of rafters is required, but also additional elements for strengthening the object.

For greater reliability it is required:
-
Place a Sprengel beam at the corners, between the sides of the mauerlat. This will strengthen the rafters diagonally.
-
Add a rack connected by a bar. Such a support for the rafters will help to redistribute the load on the structure.
-
Use planks or a bar with a cross section of 40 * 40 or 50 * 50 mm for the battens.
-
Work with dry wood treated with a protective solution.

When the shear is added at a considerable distance from the corner, an additional farm.

Nodes

On our website you can familiarize yourself with the most popular projects of hip-roof houses - from construction companies represented at the exhibition "Low-Rise Country".
The angle of inclination of the roof area of the hip roof
The statement of the angle of inclination of the slopes is the optimal solution between the reliability of the roof from winds and snow and the usable area of the attic. How to calculate the useful area of the hip roof is indicated in the picture.

The angle of inclination depends on the area in which the house is built and the climatic conditions of the region. The principle is simple: colder weather - higher angle of inclination. So the snow will naturally roll off the roof. In warm, not windy areas, it is better to make a small angle.
Another factor in choosing the angle of inclination is the material of the hip roof. Recommended values:
-
Ondulin - at least 5 °.
-
Soft tile - from 15 °.
-
Slate - 16 ° -65 °.
-
Metal tile - from 13 °. The largest angle is not set.
-
The metal folding roof is more than 25 °.
-
Ceramic tile - 35 ° -65 °.
Creating a large angle makes it possible to build a roof of corrugated flooring. In this case, the height of the profile itself should be taken into account. The angle is created within 20 ° - 45 °.
In the video we offer to see how the hip roof is covered with a professional flooring:

When designing the roof, two rules must be considered:
-
A greater angle of inclination of the roof makes the entire roof system more difficult and more difficult, and increases winds on the slopes. For a non-residential attic, the angle often varies from 25 ° to 35 °, and for housing from 35 ° to 55 °, and reinforcement of the construction of rafters is required.
-
The weight of the attic should not exceed the load indicators of the foundation and walls of the house. Violation of this rule leads to base deformation and distortion or destruction of the building.
Important! the ratio of the height of the roof to the length of the supporting walls, you can not do more than 2/3. So, if the width of the house is 9 m, and the basement and the 1st floor are 4 m high, then the attic height “for housing” is no more than 3 m, and the ridge beam height is less than 6 m.

Formulas
The area of the hip roof is defined as the sum of two hips and its side slopes. The area of the hips is obtained by the formula of a standard isosceles triangle: S = 0.5 * a * h, where a is the base of the hip, h is the height of the hip plane.
The area of the side parts is found using the trapezoid formula: S = h * (a + b) / 2, where a is the length, b is the base, h is the height. The area of the trapezoidal parts is obtained from the area of one rectangle and two triangles.
The area is calculated based on the length of the eaves, not the edge of the building.
Tip! The area of roofing building material is usually larger than this indicator for the roof. This is due to the specifics of the material overlapping "overlap". Therefore, to calculate the material on the roof is recommended to add + 10%. When the construction of the hip roof is complicated, then + 15-20%.
Hip roof - device of the truss system
To calculate the system from the hip roof rafters it is necessary, using a standard rail, to determine the horizontal projection (laying) of the intermediate truss foot.


On our website you can find contacts of construction companies that offer the service of designing, installing or repairing the roof and roof. Directly to communicate with representatives, you can visit the exhibition of houses "Low-rise Country".
In the video, an example of a structure calculation:

Thus, when the value of the distributed load on the legs is 125kg / m and the length of the span of 6 m, choose a bar with a cross section one of: 240 * 80; 230 * 90 and 220 * 100, or round timber 220 mm.
Example drawing of a hip truss roof system:

Truss system of the gambrel , scheme 2:

In this video, useful information on truss hip roof system
Hip roof installation steps
The quality of the entire roof, its reliability and its service life depend on the installation phase of the roof system. It is important to approach this issue with skill or to attract specialists.
Installation of the power plate
For installation, take a tree of the first grade with an impressive section of 100 * 100 or 100 * 150. The timber is laid only overlapped, not at the joint. There should also be a large number of connection points with the walls of the house. The joints are fastened with metal straps.
Armopoyas under the power-line are additionally constructed in buildings made of brick, foam blocks and wood concrete. Studs are sewn into such a belt in advance for subsequent wood paving.
It may be interesting! In the article on the following link read about the construction of the roof of a house.
Creating a girder
This part in the form of a beam is created for fastening additional supports under the rafter legs. The run is not one of the main elements of the system, it is implemented in large and complicated hip roof projects.
Support stands
These stands are a support for the skate.

Creating the ridge
All rely on this element of the truss gambrel roof beams. It is located in the highest central part of the roof. It is formed as a result of joining truss pairs of legs. This section of the frame has a very large load, so that the ridge beam can withstand it, several options for joining wood are used: butt, overlap and hemming in the half-timber.

Installation of truss legs
Rafters can be mounted in the following order: first diagonally, then the rest, or first central beams, followed by diagonal. At this stage of installation truss legs mounted on the mowerlat. Fastening methods several.

And also:

Important: the lifespan and reliability of the entire roof system depends on the mounting of the legs to the mauerlat. So, if you install the fasteners loosely or having made a mistake, the roof can simply be “blown down” by the wind. rafters:
It may be interesting! In the article on the following link read about the calculation of the roof of a four-slope roof.
Fastening off-wall rafters
There are two ways to attach naval rafters:


In order to create a warm attic installation should be carried out according to the following plan on the picture.

Specific features of the device during installation
Truss system of the hip roof requires the use of special tools for its construction.

For reliable construction of the bar and sturdy rafters, use metal tools. Their types and names are presented in the figure.

Methods of attaching rafters to the maurlate, installation, gash, knots and installation to the roof truss in the following video:
Additional elements for hip roof are also presented in the assortment. They are used in the course of finishing works and are used to create an aesthetic appearance. Also meet the requirements of reliable construction of the roof and connections.

It might be interesting! In the article on the following link read about roof ridge: length calculation and 6 stages of installation.
Variants of the hip roofs
To create effective architectural solutions and expand the internal space of the attic, the designers developed several variants of the device of gum objects.
Roofing with bay windows
A part of the house in the form of a projection outside the facade is a bay window. Such an element is constructed in the form of a polyhedron or rectangle and is added to the general system of rafters. The space created by him is suitable for the continuation of the living room, hall or use as a span for the stairs.
The hip roof for a house with a visor
The design of the form looks like gable tongs. Visor has a different angle of inclination than the triangular slopes of the main roof. Often designed when the building is not residential loft. Sometimes used as a carport.

Roof with a "cuckoo"
Externally, this design is a gable with understated part. The element performs the function of supplying natural additional light into the living space. It can be built at the same distance from the side walls of the house and above the entrance. It is also an additional decoration of the building.
Asymmetry
A roof project with different angles of inclination is mainly not used to create living space. It is installed in areas with strong winds. Asymmetrically located ramps and visor, acts as a wind load distribution element, and warns the object against stalling.
A roof with an irregular diagonal
Difficult projects with different in shape and length lateral parts of the roof form a diagonal offset of the rafter group. Such solutions are usually applied above the garage or bath.

It might be interesting! In the article the following link read about the roof crate: what it is and how to make it right.
Total
The hip roof adorns virtually any structure. There are a lot of types and methods of device making up its truss system. With proper calculation and installation, this roof serves a century. It is possible to use it for home, gazebos, baths and other objects.
Search
Related Articles
Crystal shaped miniature house in the forest of Lansville
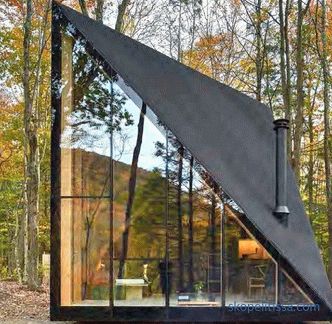
This tiny modern crystal house, located in the Lanesville Forest, in New York, was designed by the architects of the BIG studio, whose main offices are based in Copenhagen and New York. The project...
area calculation, online calculator features
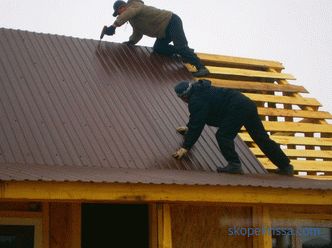
This article will discuss how you can calculate the amount of corrugated roofing for the roof, taking into account the design of the roof and the required additional elements. You will learn how to...
Entering the site through a ditch - solutions to the problem
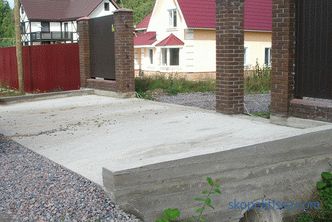
Today in the article we will talk about the often encountered situation in suburban construction. This is when the area allocated for the construction of a country house is located behind a canal or...
how to heat cheap, economical options and prices
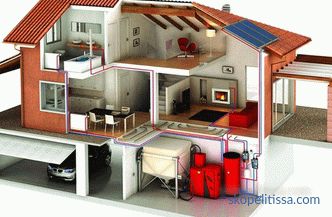
Gasification of the “rural” locality, unfortunately, lags behind the pace of suburban construction. And even for suburban residents of administrative centers, the question of what kind of heating in...
projects with stove heating turnkey, planning of the village house, photo
You can't just take a house and build it. It is important to carefully plan each stage of its construction and the costs of all materials. Even before choosing a project plan, you need to figure out...