Experts assure that the construction of the roof of the house is the most difficult stage in the construction of the building. In this article we will look at how the main elements of the roofing structure fit together. Because the quality of the final result depends on it. Having understood the information received, you will understand what and what the masters do when installing the roof and will be able to ask the right questions when discussing the type of construction and the sequence of work.
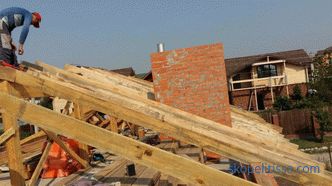
Types of roofs
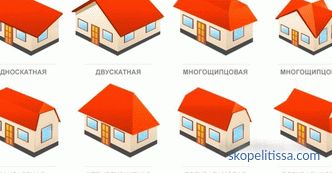
The variety of roof structures is just a change in the complexity of the assembly. Because there are very simple roofs, for example, single-pitch, which are not only simple in construction, but also cheap in terms of the amount of materials used. In this regard, hip constructions are many times more complicated. And this means that more time is spent on their erection, and the consumption of building materials exceeds several times.
We will not go into the details of the variety of roofing structures. Just denote what it is. In the photo below they are presented in full.
Basic elements of the roofing structure
Immediately need to make a reservation that not all roofs have elements which we list below. But since in general there is a conversation about the technology of building a roof, then everything must be designated. In this case, we indicate the dimensional parameters of the elements. These may vary depending on the applied loads. But for average roofs fit standard sizes.
-
The Mauerlat is a bar on which rafter legs rest. Its purpose is to distribute evenly along the walls the loads emanating from the roof structure. The optimal section of the mauerlat is 150x150 mm.
-
Ridge bar . This is a girder, located at the very top of the roof, against which the rafters rest on their upper ends. More often for this purpose use a board 50 mm thick and 200 mm wide.
-
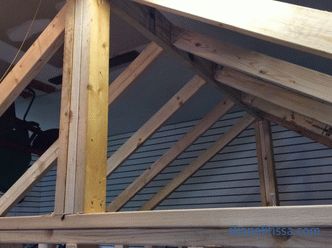
Racks that support the ridge bar or rafter. Here, timber with a section of 100x10 or 100x150 mm is used, depending on the section of the supporting elements.
-
Tightening , purlins, struts are used as additional elements. Their cross section varies in the range from 50x100 to 100x150 mm.
-
Lath . There are two types of lumber: rake 50x50 or board with a thickness of 20-25 and a width of 100 or 150 mm.
Separately, it must be said about the rafters. This is the basis of the roof, so they are calculated taking into account the type of roofing material, snow and wind loads, as well as the installation step and the span length of the house. We will not go into details, simply denote the dependence of the cross section of the rafter legs on the mounting step and length. In the table below, this dependence is clearly visible.

On our website you can find contacts of construction companies that offer the calculation service and installation of the roof and roofing. Directly to communicate with representatives, you can visit the exhibition of houses "Low-rise Country".
The sequence of construction operations
Installing a roof on a house is a strict sequence of construction processes. It can not be broken. Here are the main steps:
-
the dimensions of the box are measured buildings, because often the actual parameters may differ from the design ones;
-
preparatory work related to the preparation of tools and the acquisition of the required amount of building materials;
-
processing of lumber with antiseptic;
-
mounting the power plate ;
-
mounting the ridge girder , if present in the roof structure;
-
installation of rafters ;
-
installation and fastening of the grating ;
-
installation to ovelnogo cover , the installation of the ridge, gable and cornice brackets, stalactites and other additional elements.
If the project incorporates roof insulation, then an insulating cake is laid.
So, the stages are marked, now turn to the consideration of how all the above marked lumber are attached to each other and to the walls of the house.
Fastening of the mauerlat to the walls
Here are several options, but more often they use anchors as fasteners, which are fastened by welding to a reinforcing frame made of steel reinforcement laid into the armored belt. The latter is a tape-like construction of concrete, which is poured around the entire perimeter of the building along the upper horizontal planes of the walls.
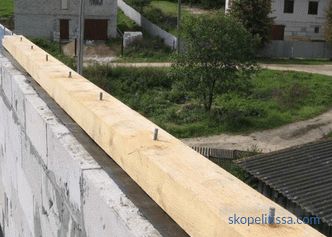
Note that if a wooden house is being built from logs or lumber, then as Mauerlata used upper crown built. If the house is frame, then the upper trim, made of beams.
It may be interesting! In the article on the following link read about the projects of houses with a flat roof.
Fixing rafter legs to the power plate
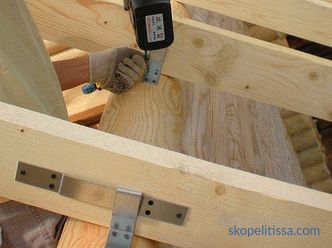
There are also several options here. But with the advent of perforated mounting profiles in the construction, the installation process itself was simplified several times. Today, few people use cuttings and other tricks. It is easier to install the profile and fasten the two wooden elements with self-tapping screws, adding a couple of long nails for reliability.
Fastening rafters to each other
To begin with, the technology of manufacturing the roof - These are two variants of the truss system: onboard and hanging. The first in its design has a ridge bar, rafters and abut it, as well as fasten. The second is a construction without a ridge girder. Rafters abut each other.
The first option is simpler to build. All actions are performed on the roof. That is, the ridge bar is first installed on the supports. Racks lower ends abut the beams of the overlap. And on top put a bar that forms the ridge of the house. Fastening elements produced by the same metal fastening profiles.
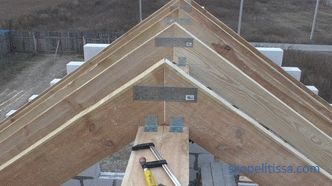
The rafters are placed over the ridge girder, abut each other and fasten with each other perforated platinum , and also attached to the ridge beam mounting angles.
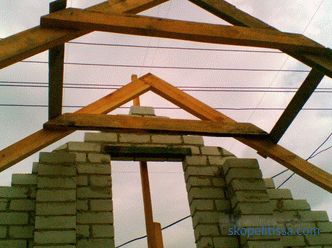
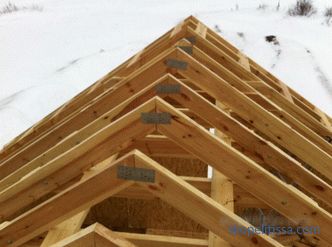
As for the hanging truss structure, it is more difficult to implement. There is no ridge bar, the rafter legs upstairs have nothing to rest on, so they are joining each other. Make it on the roof is not easy. Therefore, the construction of individual pairs of rafters, connected by horizontal puffs, is assembled on the ground. This design is called a farm. After that, the finished farm raised on the roof, set and fasten between themselves intermediate girders. The connections between the truss elements are exactly the same as in previous operations.
It might be interesting! In the article on the following link read about plums for the roof - stormwater drainage.
Strengthening the roof structure
If the task is to build a roof for a house with a span of more than 12 m, then you need to take care of the reinforcement of the truss structure. In this case, take a single option - the installation of supports under the rafters. In fact, these are the usual racks, which abut the lower end of the floor beams, the upper end of the rafter (somewhere in the middle of its length).
But it is also necessary to take into account the step of installing rafter legs. This is especially true of the hanging variety. They have no upper support, therefore, the probability of collapsing farms is high. Only one way out - to install runs on intermediate racks. They will link the farm together in a single structure. By the way, such a run is often set at the highest point. But this bar does not perform the function of a skate.
Some masters believe that the runs are an optional element, because the trusses between themselves are held together, ultimately, by a crate. For installation of small roofs, the statement is correct. But for large roofs with hanging rafters, it is impossible to do without additional runs.
Installation of the battens
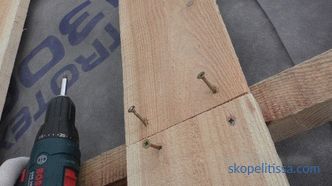
This is the simplest process in the construction of the roof structure. To do this, used as fasteners or nails, or screws. The main requirement for the length of fasteners is double the thickness of the batten element. And this is the minimum figure.
And a few more nuances:
-
they join the elements of the batten only on the rafters ;
-
if solid option of plates or sheets, you need to choose moisture-resistant material ;
-
the plates and sheets are stacked on the roof in checkerboard , the main thing is to the joints were not on the same line.
Roofing and creating a heat-insulating cake
In this situation, the main thing is the accuracy of the sequence of construction operations th .
-
The waterproofing film is placed across the rafter legs across the roof . The process starts from the eaves and moves to the ridge. Subsequent strips of waterproofing are placed on the previous overlap with an offset of 10-20 cm. The joints are closed with self-adhesive tape.
-
Spend installation of roofing material .
-
The remaining processes transfer to the attic room .
-
Put between
insulation . -
At the top, as in the case of waterproofing, the vapor barrier film is laid in strips.
When using heat-insulating materials that do not absorb moisture, for example, Penoplex plates, vapor barrier film is an extra layer.
The sequence of building the roof in the video:
It may be interesting! In the article on the following link read about the project at home with a wavy roof.
Conclusion on the topic
Since there are several options for roofing, they build roofs differently. But the basis of any model are the same construction operations. These include installation of a power plate, installation of a truss system, lathing, laying of roofing material, and assembly of an insulating cake. The latter may be absent if the project is being built cold roof.
