Protecting the ground floor from water leakage, protection from wetting of wall and floor materials - these are two main tasks that waterproofing of the bathroom solves. This stage of work should not be missed, because even the use of such wall decoration as glass or glazed ceramic tiles with moisture-resistant grouting does not fully guarantee that moisture will not enter the room’s enclosing structures.
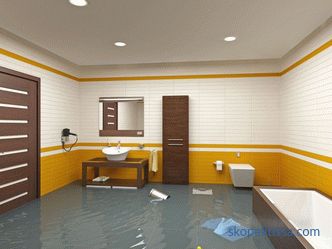
The waterproof barrier must be reliable
What materials will be needed - what to choose
By the method of applying materials for waterproofing barrier can be divided into two groups:
-
painting, coating and impregnating;
-
roll and sheet.
There are also compositions for injections, but such a method of application (more precisely, “insertion” into the structure) is not used in bathrooms.
As the name implies, the first three types are liquid or pasty substances capable of creating a seamless waterproof coating.
Rolled and sheet materials are glued to the surface in the form of thin sheets, lapped or butt, with welded, brazed or glued seams.
Usually, when creating a waterproof barrier, not one but two or three materials are used in combination. And this set of tools is determined by the selected waterproofing scheme.
Comparison of various materials for waterproofing on video:
Where waterproofing is needed
Floor waterproofing is needed not only on its entire surface. Features of the operation of the bathroom are such that there are certain requirements even for the height of the threshold of the doorway, (so that when water leaks, it does not fall into other rooms). Therefore, the waterproof barrier is made in the form of a “trough” with a height of sides around the perimeter of the walls by at least 10 cm.
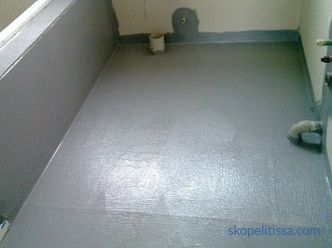
The waterproofing layer is applied to the entire protected surface
Unlike the floor, waterproofing the walls in the bathroom may not be "continuous." During normal ventilation of the room, water vapor will be removed before it reaches the wall materials and will have a damaging effect on them. We must also take into account the finishing tiles, which also serves as a good barrier to moist air.
Usually, only the areas adjacent to the bathtub, shower and washbasin are treated - the so-called “wet zones”. ”That is, where direct contact of the walls with water is possible when using sanitary fittings.
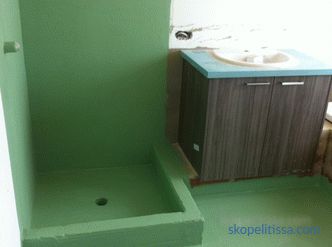
The walls in the shower stall area must be completely protected from water
The selective approach is dictated by the cost of materials and work. But if there are no restrictions with finances, then or painting waterproofing of the walls in the bathroom will not be completely unnecessary.
Methods of waterproofing the floor
In the condition Possible pressure of water is the most reliable materials for waterproofing bathroom, roll materials are considered.
They used paper as a reinforcing (bearing) layer, now they give preference to fiberglass or woven polyester. bitumen.
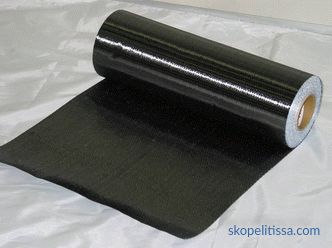
Modern rolled waterproofing is completely different from roofing material
Attention. The use of the bathroom does not allow the use of polymer films, as is done when waterproofing the floor in a residential area. The durability of such material is much less than that of a tile, and the floors can begin to flow long before the next major overhaul.
The following waterproofing is considered to be next in terms of reliability. But it is usually "strengthened" in the corner joints with walls and partitions by sticking tapes of roll-up waterproof materials.
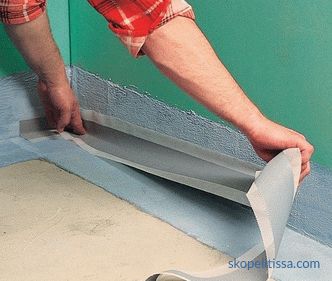
Waterproofing of the corner joints provide a double barrier
Floor surface preparation
The algorithm for preparing the base for applying waterproofing is standard:
-
dismantle the old coating (if any);
-
clean the surface from debris and dust;
-
assess the state of the overlap and joints (between the slabs and walls);
-
ground areas to be repaired and sealed with repair compound;
-
cleaned and restored tightness of pipe passages in the ceiling.
As a result, the floor surface must be flat (the height of irregularities is not more than 2 mm) and without "sharp" edges that could damage the integrity of the waterproofing layer.
Similarly, it is necessary to prepare the lower part of the walls to a height of 20 cm.
Then the surfaces should be completely dried - bituminous primers, mastics and rolled materials with bitumen impregnation are applied only on a dry surface.
The final part of the preparatory work is the application of a primer or treatment with a bituminous primer.
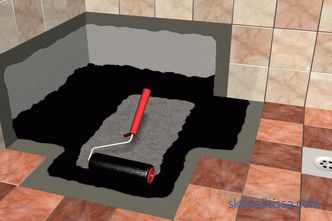
This is how the bathroom floor looks by layers: base, waterproofing, screed, tile
The second option is preferable if then roll materials are used - the primer is not just a primer, but a product that works similarly to painting waterproofing.
Bonding roll insulation
The primer is applied to the floor using a nylon brush or a brush. Particular attention is paid to problem areas: the joints of plates and walls, pipe aisles.
Warning. It is necessary to work with the primer with the ventilation running.
Rolled waterproofing rolls strip overlap. The amount of overlap of the bands is at least 10 cm (recommended - 15 cm), walling is from 10 to 20 cm.
The optimum temperature of the air in the room is at least 20 ° C.
There are two types of rolls according to the method of "fastening":
-
Classic. With the help of a blowtorch (or an industrial dryer), the “seamy” side of the strip is heated, moving from its beginning to the end, and simultaneously pressing it to the floor surface.
-
Self-adhesive materials.
The technology of sealing waterproofing strips is similar to working with wallpaper: the formation of air bubbles is not allowed - they are expelled by rolling the roller from the center to the edge.
The most difficult places are the intersection of the outer corners of the walls and the floor, as well as the places of the pipelines. In order to ensure the continuity of the waterproofing carpet, separate patches are cut and pasted for these places.
Reliable waterproofing is considered if there are at least two layers and the seams between them do not match. All overlapped seams are additionally covered with bitumen mastic.
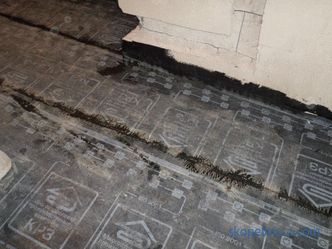
Though not "attractive", but reliable. And it will be beautiful after finishing
Floor coating waterproofing
This is a simpler technology, but the result should be the same - waterproof trough with a side height of up to 20 cm.
Before applying the waterproofing compound, the corner joints of the floor and walls are treated with an additional layer of mastic and a waterproof tape is glued over it.
Coating waterproofing for the bathroom in the corners and along the perimeter of the walls is applied with a wide brush. The floor area can be roller treated.
Clearly the whole process and possible nuances of the video:
The minimum number of layers is 2. Each next one is applied after drying the previous one.
After the creation of the waterproofing layer is completed, the floor is ready for filling the screed and laying the finishing coating (tile or self-leveling polymer floors).

Self-leveling 3D floors can be confusing
Waterproofing wooden floors
If the bathroom is in a wooden house (or in a brick house, but with hardwood floors), the waterproofing technology for the bathroom is different from the above.
When laying tile or arranging self-leveling floors, it is necessary to take into account the peculiarities of the base and the finishing coating.
The tree reacts to moisture fluctuations, and practically does not change its size with temperature drops. Ceramics, mineral materials and polymers are completely opposite in nature - they do not respond to changes in humidity, but increase in size with increasing temperature (and vice versa).
Therefore, the preparatory stage is as follows:
-
To the wooden floors they assemble sheets of moisture-resistant plywood (the usual format is cut into 4 pieces, and the large one into 8 pieces). Rows are laid in a "razbezhku" with a shift of transverse seams. 3-5 mm gaps are left between the sheets. Along the perimeter of the floor leave a damper gap between the walls of about 10 mm.
-
An elastic tape is placed in the damping gap, and a sealant is applied between the plywood plates.
-
All corner joints of the floor with walls are covered with waterproof tape.
-
2-3 layers of waterproofing mastic are applied with access to walls 10-20 cm high.
If polymer-cement coating waterproofing is used, it can immediately lay the finish. On top of bitumen mastic it is necessary to pour a thin layer of the screed reinforced with fiberglass mesh.
Waterproofing walls
Of course, in this case you can also use rolled or sheet materials. But bathroom walls are not a foundation on which groundwater is being pushed. Here it is enough to apply one layer of coating waterproofing.
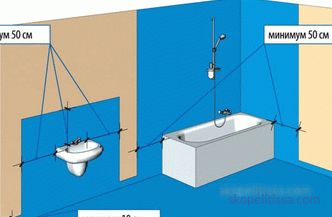
"Standard scheme" of waterproofing bathroom walls
Once again about the question "what's better"
What is good for horizontal planes, not suitable for vertical enclosing surfaces.
Bituminous mastics have good fluidity. For the floor it is a positive property - you can be sure that the pores and microcracks of the base will be filled with a hydrophobic material. For mastic, the fluidity of the mastic is undesirable - over time, some of the mastic will begin to "crawl", and this may affect the integrity of the finishing layer.Therefore, for the walls it is necessary to use polymer-cement compositions.
And this again shows that there is no definite solution, when choosing which waterproofing is better for the bathroom. You can only answer that waterproofing should be comprehensive.
About errors during waterproofing of premises in the video:
Work steps
There are also walls preparatory stage, which has almost the same appearance as for the floor:
-
cleaning of the old coating;
-
repairing surface defects;
-
applying a primer with hydrophobic and antiseptic properties.
After the soil dries, a waterproofing solution is applied with a spatula or trowel, and it is evenly distributed on the wall. And since this is not a putty, then there is no need for a perfectly smooth surface - small irregularities and roughness compensate for the layer of tile adhesive.
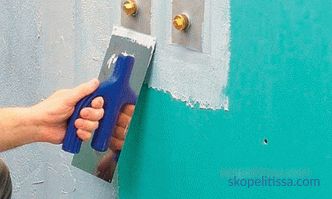
Even moisture resistant plasterboard must be protected
As a result, who can be trusted with bathroom waterproofing
Bathroom waterproofing works rooms seem uncomplicated. But there are also "pitfalls" here. And most importantly - you need to choose the right scheme for the use of materials and have certain building skills. Therefore, it is better to entrust such work to professionals.
