A big plus of wooden houses is that they practically do not need finishing work. But “they don’t argue about tastes,” and in some cases, the owners of wooden cottages still prefer to see on the walls, for example, wallpaper, and for this they need to finish the interior. One of the popular options for creating a rough surface is plasterboard plastering - in a wooden house it is used almost more often.

Drywall: for and against
-
Relative cheapness : it is cheaper than lining, for example;
-
Safety - when using a special one impregnated with moisture or drywall plasterboard practical qualities of a wooden house will remain, and reliability of operation will increase;
-
You can do not only finish walls , but also make ceiling made of plasterboard in a wooden house;
-
Ease and practicality of installation - a large area of sheets will allow you to immediately close impressive surfaces, in addition, drywall can bend and take on a variety of shapes. It is easy to make small elements for mounting out of it in order to close hatches, boxes or pipes.
-
Combination of qualities : it is a good covering material, and, moreover, it is used for additional insulation of the house or its vapor barrier;
Of the minuses in the use of drywall, you should definitely mention:
-
Fragility - both during transport and in operation. Without special fasteners, attempts to hang something heavy on drywall are guaranteed to end up with material damage;
-
Low temperature operating mode - if colder than minus 10 ° C, work with drywall is stopped;
-
Bulkiness is relative to other materials; drywall can eat a dozen or two centimeters of valuable space during installation, so using it in small rooms is not advised.

Features of the wall decoration with drywall wooden house
Wood is a natural material, with all the ensuing consequences in the operation. Before plastering the walls in a wooden house, the following steps should be carried out:
-
Provide additional protection against fungi and parasites, which happily attempt on wood - that is , to treat the walls before further work, to caulk cracks, holes from knots and cracks in which moisture can condense;
-
Also to process walls with fire-fighting (flame retardant) solution;
-
film-paroizolyator must be laid under the drywall, regardless of whether Whether you are warming the house or not;
-
The next problem of wooden houses is shrinkage , so you should wait until the house passes this stage (the exception is already dry profiled timber, but such houses are much more expensive), and only then proceed to the finish;
-
And even after the shrinkage step, it is recommended to perform the plating on the frame, which is also independent not tightly tied to the floor or ceiling - so that the deformations do not damage the drywall;

-
When installing electrical wiring, again, it is necessary to remember about fire safety , therefore, all wires should be removed into the metal "corrugation" or mounted in an open way - in cable channels.
For bathrooms and rooms with high humidity, you should choose moisture-resistant drywall, and for chimneys and furnaces when they are finished - fire-resistant.
On our website you can familiarize yourself with the most popular projects of wooden houses from construction companies represented at the exhibition “Low-Rise Country”.
How to install the frame
The frame in a wooden house for drywall can also be wooden or metal. The latter is considered more durable, in addition, the wooden frame will be used only in the house with full shrinkage.
A floating frame for drywall in a wooden house is absolutely necessary, both in homes before the shrinkage stage and after it, because the fluctuations of the linear dimensions of the premises of the ceiling and floor dimensions continue. The main types of frame two, both are mounted on a similar principle. If a wooden frame is used, like walls, it should be treated with fire-fighting agents.
The frame is mounted after the stage of processing the walls, but before the laying of internal communications (which will be hidden under the drywall).

The metal frame is made of profiles (guides and ceiling) self-tapping screws. Also used in the work of the Bulgarian, prosekatel, level and screwdriver, pencil, stepladder, tape measure and prosekatel. If you plan to cut the sheets, use a special knife for drywall.
With the help of the entire set, the work is done in the following order:
-
The guides are mounted on the floor, in the level “broken” in advance;
-
Marking lines for vertical posts, at a distance of about half a meter, so that at least two or three guides per one standard sheet, and the junction of sheets should fall on the guide;
-
Racks are cut using the following formula - wall height minus about 10 cm (shrinkage);
-
are cut through each profile grooves about 10 cm long and slightly wider self-tapping screw, on which it will be attached to the wall, usually numbered each profile (as the tree is very different, and the grooves may fall on knots or cracks, which is unacceptable: in this case the groove is displaced);
-
Such attachment points on each - 3-4 pieces minimum, under them small bars are also screwed onto the wall so that the support area is larger;
-
Next if necessary, metal corrugation with wiring is mounted;

On our site you can find contacts page itelnyh companies that offer service home remodeling. Directly to communicate with representatives, you can visit the exhibition of houses "Low-rise Country".
-
The established profiles are screwed with a cutter or self-tapping screws with other profiles (as if to be turned around), so that you can put drywall on top;
-
Set the cross-section to maintain rigidity (usually cut from a regular profile).
The wooden crate for drywall in a wooden house is assembled in the same way, but since the wood is softer material, in addition to the surface of the bars, you can provide a recess for the screw head to create a perfectly smooth surface. In addition, all bars also need to be treated with moisture, fungus and fire agents.
The following bars are used for the frame:
-
Length is from 2 to 4 m;
-
The timber is well dried, has no visible damage and bends;
-
Section 40 by 40 or 50 by 50, or 40 by 50 mm.
It is believed that the wooden frame will serve less than the metal, however, subject to the technology of laying and processing, their service life is about the same (if, of course, the beam itself selected acceptable quality).

We warm the walls before installation
Before installation of drywall, optionally installed insulation - mineral wool, foam or other. So that the insulation does not get wet, a vapor barrier film is attached on top of it. All materials are purchased with a 10% margin.
For installation, for example, of foam plastic, the following work steps are performed:
-
Additional alignment of walls is performed or the most prominent section is determined, which will be assembled;
-
The wall is treated with a primer ;
-
The foam is mounted in the reverse order of the gypsum board - that is, first put the pieces on small surfaces, and then use large sheets;
-
Window openings and other potential hazards of cracks are additionally spattered;
-
Through a couple of days additional sheets are attached with dish-shaped nails, under which holes are drilled in the wall;
-
If at this stage there are gaps, they are closed with pieces of foam or assembly foam (toluene free!), the excess is cut with a knife, the joints are again covered with an adhesive solution.
A special stapler is used to fasten the wool. You should also avoid the appearance at this stage of cracks or gaps, as otherwise the sense of thermal insulation will be lost.

It might be interesting! In the article the following link read about a fireplace in a wooden house.
The stage of processing the walls from the fungus and the fire should be carried out before laying the insulation.
Next, drywall itself is attached, while order is observed - first large sheets are fastened, then small elements are fastened.
For a few more helpful insulation tips, see the video:
Installing Drywall on Walls
This step seems to be simpler than the previous one, but it’s still required:
-
to observe technological gaps - you can leave 1 cm below, then close it with a plinth, you will need more from above - approximately from 5 cm;
-
in addition, between the sheets themselves, leave 2 mm , then close them with a putty;
-
overlap is allowed, when the edges of the sheets are handled manually, forming ly at 45 degrees, then placed "butt"; horizontal lines of gypsum plasterboard laying should not converge (sheets are laid in a “checkerboard” order);
-
it is recommended to screw the screws at a maximum distance of a quarter of a meter from each other, but not more than;
-
the seams on top are best glued with tape ("serpyanka") and then puttied.
In some cases, to save space, profiles are embedded in walls. In this case it is necessary to take into account the inevitable shrinkage of the wooden house. Clearly shown in the video:
The gaps between the ceiling and the sheets are covered with decorative elements, but you should also know that they should not be attached to the walls either. To preserve the flexibility of movement of the structures, the screws do not tighten tightly, leaving a small gap in case the structure “walks”. But the cap of the screw should be "drowned" so that later you can properly zashpatlevat surface or pokleit wallpaper.

The final finish of a wooden house with drywall after installation also allows tile installation.
It can be interesting! In the article on the following link read about materials for wall decoration inside the house.
Conclusion
Drywall is easy to use, practical and good even for wooden house conditions. The main part of the work falls not on work with the drywall itself, but in preparation for its installation, processing of walls and laying the profile. A variety of material choices allows you to choose drywall for any room, including bathrooms, kitchens and rooms with open fires.
Rate this article, we tried for you
Search
Related Articles
Materials for finishing the walls inside the house, types of what to choose, photo
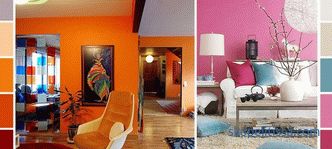
The house was built, and there seemed to be a trifle - to finish the interior and you can import furniture. But to order the correct finish, you need to know the rules of combination and use of basi...
What to look for when choosing a land plot
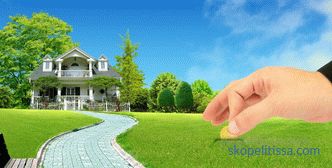
Having your own plot of land gives a feeling of stability, reliability and confidence in the future. Tomorrow, of course, may not come, however, you will have an asset that you can always sell and s...
analytics, advice, help with the choice of materials.
In this article we will tell you about what are the options for planning a house 5x6 with an attic. A variety of accommodation schemes will be offered with a balcony, a terrace, a veranda, a childre...
Ventilation of a country house and cottage, projects, how to choose the best option, installation features
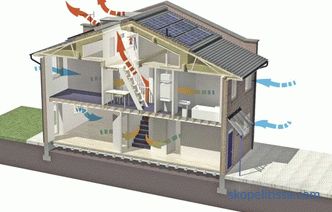
For a comfortable stay in the cottage it is important to ensure good air circulation. The ventilation of the cottage has a special scheme and must be developed by qualified specialists. Owners of fu...
The best ideas for the design of the yard in a private house, photos and videos
The design of the courtyard of a private house is as important as the interior design of the premises. Qualitatively designed area around the cottage or country house increases the respectability of...