Skylights are the roof element, the installation of which requires a professional approach. Especially if the roof is already covered with roofing material. A small mistake or assumption will lead to leakage during the operation of the roof. Therefore, in this article we will talk about how to properly install a roof window in the finished roof of metal. We will tell you the whole sequence of operations, let us designate the nuances of the installation process and draw your attention to some subtle points on which the quality of the final result depends.
Select the installation location
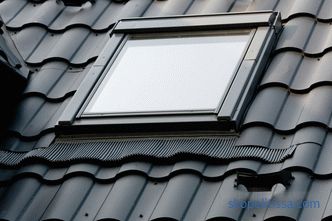
Immediately make a reservation that the roof windows install only between the truss feet of the roof structure of the house. In this case, the width of the window product is chosen so that there is a gap between 8–12 cm between the outer ends of the frame and the rafters. In the case if the intersectional space does not allow installing a window with such gaps, i.e., the installation step is small, it is recommended to mount not one big window, but two small ones. Fortunately, the size of the dormer windows is quite wide, besides, manufacturers offer the service of manufacturing windows to order under the required parameters.
If the roof is erected with a large angle of inclination, then it is better to install skylights in the lower part of the ramp. If the roof is assembled flat design, then at the top. On steep roofs, window structures are installed at a minimum height of 10–12 cm from the eaves, if the fittings are located in the upper part at the roof window. And at a height of 12-15 cm, if the hardware is located at the bottom.
Installation technology of the attic window
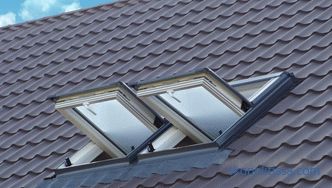
We assume that the attic has been used for a long time, that is, it is insulated, covered with roofing material and even trimmed from the inside. There was little light in it, so the owner of the house decided to install a pair of dormer windows.
First of all, you need to find a place between two truss legs. To do this, it is necessary to remove the covering from one side of the ramp. Usually it is plywood, OSB boards or chipboard, often use drywall. All of these plate materials are attached to the crate or rafters with self-tapping screws, so the latter are simply unscrewed, and the sheet of plating is removed.
Behind the lining there is a heat-insulating cake, which from the inside is closed by a waterproofing membrane. It is usually attached to the rafter legs, so that it will be clearly visible where the elements of the truss system are located, and the opening between them. He needed to install the window in the roof.
It is very important to trim the waterproofing material correctly by making an opening in it. Firstly, there is a gap between the truss legs and the frame of the roof window, which was mentioned above. There is still a section around the perimeter of the window opening 20 cm wide. These strips of waterproofing on each side will subsequently close the joint from the inside.
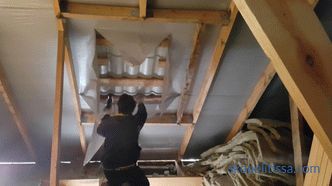
The knife cuts a rectangular section of the waterproofing membrane. The heat-insulation layer is also cut out, plus a vapor barrier film, which is located between the insulation and the roof covering.
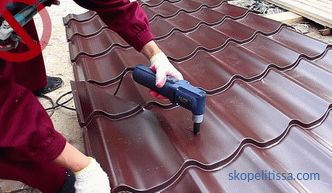
The next stage is the cut-out of the opening in the roofing material. Since this is a metal tile, you should not cut it with a cutting disc mounted on the grinder. Because the high speed of the tool in contact with the metal starts cutting at high temperature. And this is the burning out of the protective layers with which the roofing material is processed. That is, the place of the cut becomes open to moisture, which immediately begins to negatively affect the metal. The latter begins to corrode, reducing the life of the roofing.
Therefore, metal materials for covering roofs are cut with scissors for metal: manual, mechanical or hydraulic. But the difficulty lies in the fact that the metal tile has already been installed, getting to the edge of each element is difficult. Therefore it is necessary to make a small cut with a cutting disc, literally 10 cm long. This is enough to insert a scissors blade into the slot. And after that it is necessary to cut the metal roof along the perimeter of the opening. The place to cut with a disc is subsequently recommended to be painted.
A small nuance that concerns the sheathing. Surely, one of its elements will fall into the area of the opening. It will have to be cut as well, but with one condition: so that the ends of the board or slats of the sheathing protrude 20 cm inwards beyond the truss legs.
On our website you can familiarize yourself with the most popular projects of houses - two-story and with an attic construction companies represented at the exhibition "Low-Rise Country".
Fastening the mounting bar
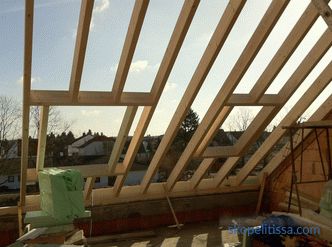
The installation of windows in the roof begins with the formation of an opening under the frame. To do this, you must create a perimeter. Two rafters are already there, it remains only to install the restrictive element, it is the mounting bar, above and below. To do this, use the lumber, which made the rafter legs. They are mounted across the rafters, exposing strictly horizontally. The distance between the mounting bars is the height of the roof window.
As soon as the two beams are installed, vapor barrier and waterproofing are attached to them with the help of metal brackets and a stapler. Insulation should fit snugly to the outer ends of the installed elements. That is why all layers of insulating cake are trimmed with a margin.
On our website you can find contacts of construction companies that offer roof repair services , installation of windows and doors, home insulation. Directly to communicate with representatives, you can visit the exhibition of houses "Low-rise Country".
Assembling the frame of the attic window
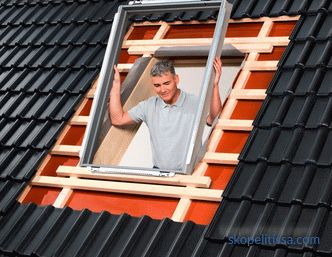
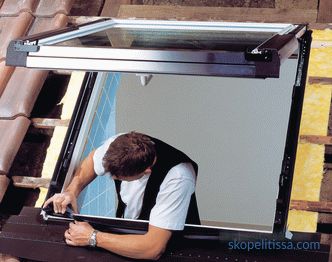
It should be noted that it is impossible to install the attic window when assembled in the roof opening. Therefore, it is dismantled, that is, remove the sash. After that, the frame is installed in the opening so that it rested against the mounting beams, to which is fastened with long screws on the tree. The length of the fastener is equal to the width of the frame profile and the thickness of the timber. Screwing the screws is carried out through the mounting holes, which the manufacturer makes in the factory in the frame of the window product.
The next step is to insulate the roof window from the side of the rafter. Since a part of the heat-insulating cake remained, it is often used to seal the gap between the frame and the rafter legs. But, as practice shows, this is not enough, so it is recommended to buy a small piece of insulation that was used on the roof, and cut off two strips from it. They are placed in the resulting gap, no matter how small it is.
There is another way to install a skylight frame. Under its dimensions make a box of boards with a thickness of 40-50 mm. It is installed at the place of formation of the window opening, fastening to two adjacent rafter legs with self-tapping screws or perforated steel profiles. And already in this box install the frame, fastening screws through the mounting holes. In the photo below, just such an option is shown.

Note! Please note that the gap is closed using polyurethane foam from the can, you can use a special foam sealant. This option is easier than putting pieces of foam or mineral wool into the gap.
Waterproofing of the attic window
Included in the windows are special items that are called aprons. These are corner elements made of galvanized steel sheet, painted to protect against moisture, or a special waterproofing material.
Attention! To install roof windows, you need to use only aprons that come in a set or recommended by the manufacturer of window designs. Even a small discrepancy, which is unnoticeable at first glance, can lead to big troubles during the operation of skylights.
Aprons are installed around the perimeter of the frame or duct, and fastened with self-tapping screws to them. When mounting it is important that the upper apron overlaps with its edges the upper edges of the side elements. And the latter overlapped the edges of the lower apron with their lower edges. In this way, complete tightness of the joints is achieved.
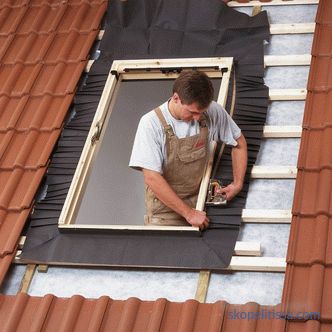
Another point. Part of the plane of the lower shelves of the apron should be located on the crate, closing the heat-insulating layer of the roof at the junction with the roof window. Already after the assembly of the roof covering a part of the plane of the aprons will be covered with a metal tile.
It may be interesting! In the article on the following link read about the light under the roof: modern solutions for the attic - windows and window systems.
Assembly of metal tile and installation of a salary of
If a section of the roof was cut from the inside, assembly of the metal tile is reduced only to filling the space between the window and the roof covering. And this is a small strip around the perimeter of the window. To do this, purchase a new metal tile is not necessary. You can close the strips of painted galvanized steel sheet. It is better if the sheet is covered with a polymer layer. The main thing is to choose the color in accordance with the color of the metal tile. The bands are attached to the crate.
If the option of partial disassembly of the roof covering from the outside was used, then it will be necessary to re-assemble using standard technology.
And installation salary.This is an element of the attic window, which forms the protection at the bottom of the window opening and on the sides. In fact, this is the same apron that fits over the metal tile located below and from the sides of the window construction. Fix salary and crate and to the frame.
Installing the sash and slopes
And the last two steps that end the installation process roof window in the finished roof. The way of installation of a shutter opposite to removal.
The video shows how to properly disassemble the dormer window and the process of removing the sash:
And as for the slopes, there are a large number of options. But there are two important points in this event:
-
The upper slope of should be set to horizontal to , and lower to - vertically . Only in this way you can achieve effective blowing glass. If this is not taken into account, then condensate will collect on the glasses.
-
Slopes you need y to warm . For this you can use any insulating material. But better foam sealants. It is better not to apply foam.
In the video, the master tells how to correctly install the roof window in the metal-covered roof:
maybe interesting! In the article on the following link read everything about prices for roof windows on the roof and the cost of installation works.
Conclusion on the topic
The installation of a skylight in a soft roof covered with metal tiles, corrugated board or any other roofing material is carried out using the same technology. Of course, each manufacturer has its own subtleties and nuances, but in general, the sequence of operations performed is the same.


